As I mentioned in the previous post I am for printing precise mechanical components with Elegoo Mars. I have already tested the dimensional accuracy in the Z-axis direction. If I omit the precision problem near the build platform, it is sufficient enough.
The dimensional precision of the printed components in the XY direction is affected by the following constraints:
- the display itself. Here I assume it is precise enough. If not, I could tweak display size in the slicer.
- Exposure and “overgrowth”. If you cure the resin for a long period of time, some of the UV light gets reflected from the resin itself and therefore it exposes the resin around the exposed area. This leads to a bigger outer and smaller inner dimension. There are two ways to compensate for it – you can lower the exposition time or you can compensate in the slicer.
- Linear shrinkage of the resin. Like all resins (epoxy, polyurethane, etc.) even the UV curable resin change their dimensions (usually shrink) during curing. Usually, the manufacturer provides information about shrinkage in the datasheet or you can try to measure it and compensate for it.
I have a rule – in the CAD I design the components as they should be in reality. I do not want to put any compensation in my CAD models. I want the manufacturing process to take care of them: e.g. the slicer does it itself or I have a script to post-process my CAD models. Luckily, ChiTuBox can compensate for all the sources above.
To compensate for LCD size, you can directly change its parameters in the default setting dialogue of the print. See image below. However, I think there is no need to do that.

LCD screen size can be directly adjusted
To compensate for the overgrowth, you can only tune the exposure time in the ChiTuBox menu. However, this has a problem that incompletely cured layers, which don’t overgrow are in some cases not strong enough to support the print. Fox example with Elegoo Gray, exposure time of 4 seconds leads to quite precise components. However, if there are massive planes, the risk of breaking the prints are quite high.
Luckily, if you export the profile and open it in a text editor, you find out it is just a plain text file with key-value pairs. There are two interesting keys: edgeCompensationPixel and edgeCompensationTimePercent. I expect the first one to shrink the sliced by the given number of pixels using the traditional erode operation on images. It can be used to compensate for the overgrowth. The second one seems to scale the entire slice – which can be used to compensate for resin shrinkage. You just edit the values and import the profile back. A little inconvenient, but better than nothing.
Actually, the previous two paragraphs are not true. The compensation feature does not work and the experiments below are results of bad labeling of my files (I mismatched the exposure settings in them). I plan to publish a new post with corrected results and alternative solution soon.
To find the right values I modeled a simple test piece (Fusion 360 model):
These pieces should form a press-fit – they should go inside each other but the joint should hold and it should require some force to put them together.
Then I printed them twice for every setting – one set aligned to X and Y axes, one set tilted by 30 degrees in the Z-direction. The tilted set should verify how the joint behaves when it is not a nice straight line but is formed out of pixels. The printing was time-consuming as you have to print for each setting separately – I haven’t hacked the printer and process to support multi-exposure prints.
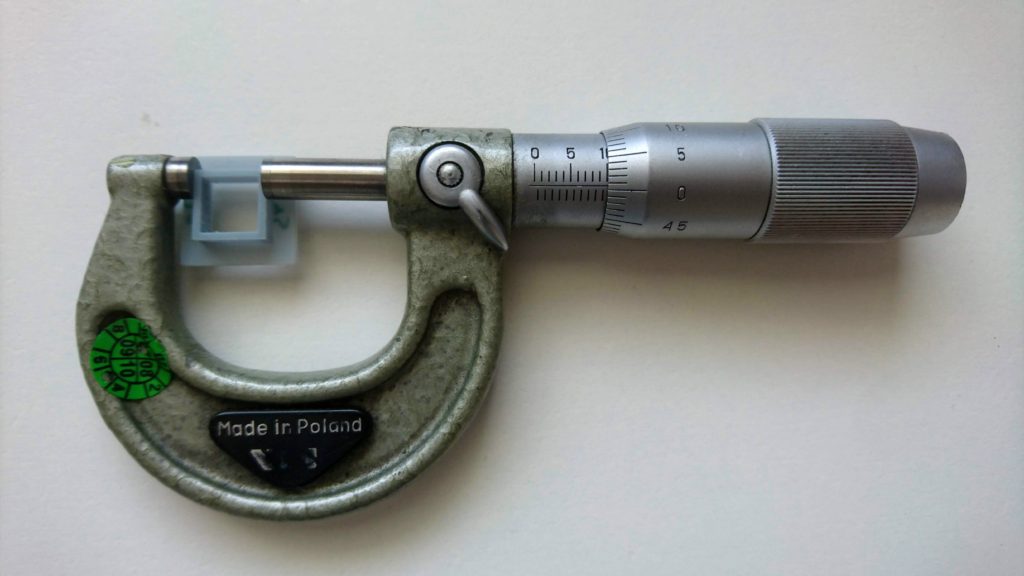
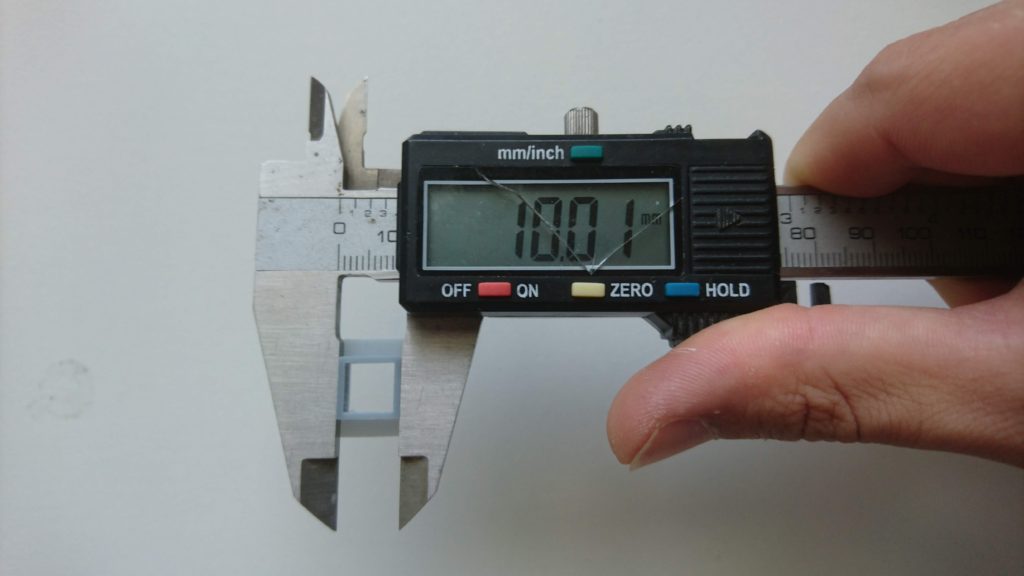
My results for Elegoo Gray are 5.5 seconds exposure time and edgeCompensationPixel is 2. I did not compensate for shrinkage as it is probably insignificant for the size of my prints. This gives me nice results really close to expected size and expected fits:

Micrometer shows 10.01 mm 
The same goes for the digital caliper
The only downside right now is that ChiTuBox does not support separate compensation for the first layers which are over-exposed to stick well to the build platform. Hope it will be available in the future along with the option to specify compensation parameters in the GUI.


