Let’s start with a disclaimer: This is a 4-day project, without a lot of planning, made only from home-available supplies.
I’ve been helping to hold K-SCUK (a week long outdoor seminar for high school students interested in informatics and biology) for few years now. This year was no exception. I was put in charge of the night game, which was supposed to uncover some information about K-SCUK background story. I decided to go for a simple game with “wow effect” instead of a game with sophisticated rules and deeper message. I wanted a simple and enjoyable experience for the contestants. To accomplish that, we prepared linear route in a forest with several stops featuring a simple task (a cipher for example). This alone wouldn’t be enough to provide a memorable “wow” experience.
During the preparations of the game, I remembered the Firewatch game. Note, that the rest of the paragraph might contains a small spoiler. During the game, you discover a device, which helps you to locate source of a signal. The device has a simple interface — the rate of beeping is proportional to the distance to the source of signal. Nothing more. With this device you walk alone through the forest and search the source of signal. The game has a dense atmosphere in this point, which is hard to describe — you should play it.
I decided to provide similar atmosphere for the game participants. To achieve that, I wanted to build a device which a participant should find, insert batteries and follow the beeping to find next stop. Imagine the strong feeling of straying in the middle of a night in an unknown terrain far away from civilization trusting only a beeping thing, you found. That was something I wanted to achieve. After thinking it though, I come up with these requirements for the device:
- It should be able to navigate through series of waypoints. I added several waypoints to guide user a little bit more, as the terrain during the game could be dangerous and the right route could be hard to find in the middle of night.
- It should signalize distance to the next waypoints with beeping<./li>
- It should also show direction — this requirement is for the same reasons as the first one. I also didn’t want to frustrate user by long search for the next waypoint.
- It should be powered from user supplied battery to enhance the experience.
After making this requirements, I started with a design. After 3 hours, the first design of the device was created.
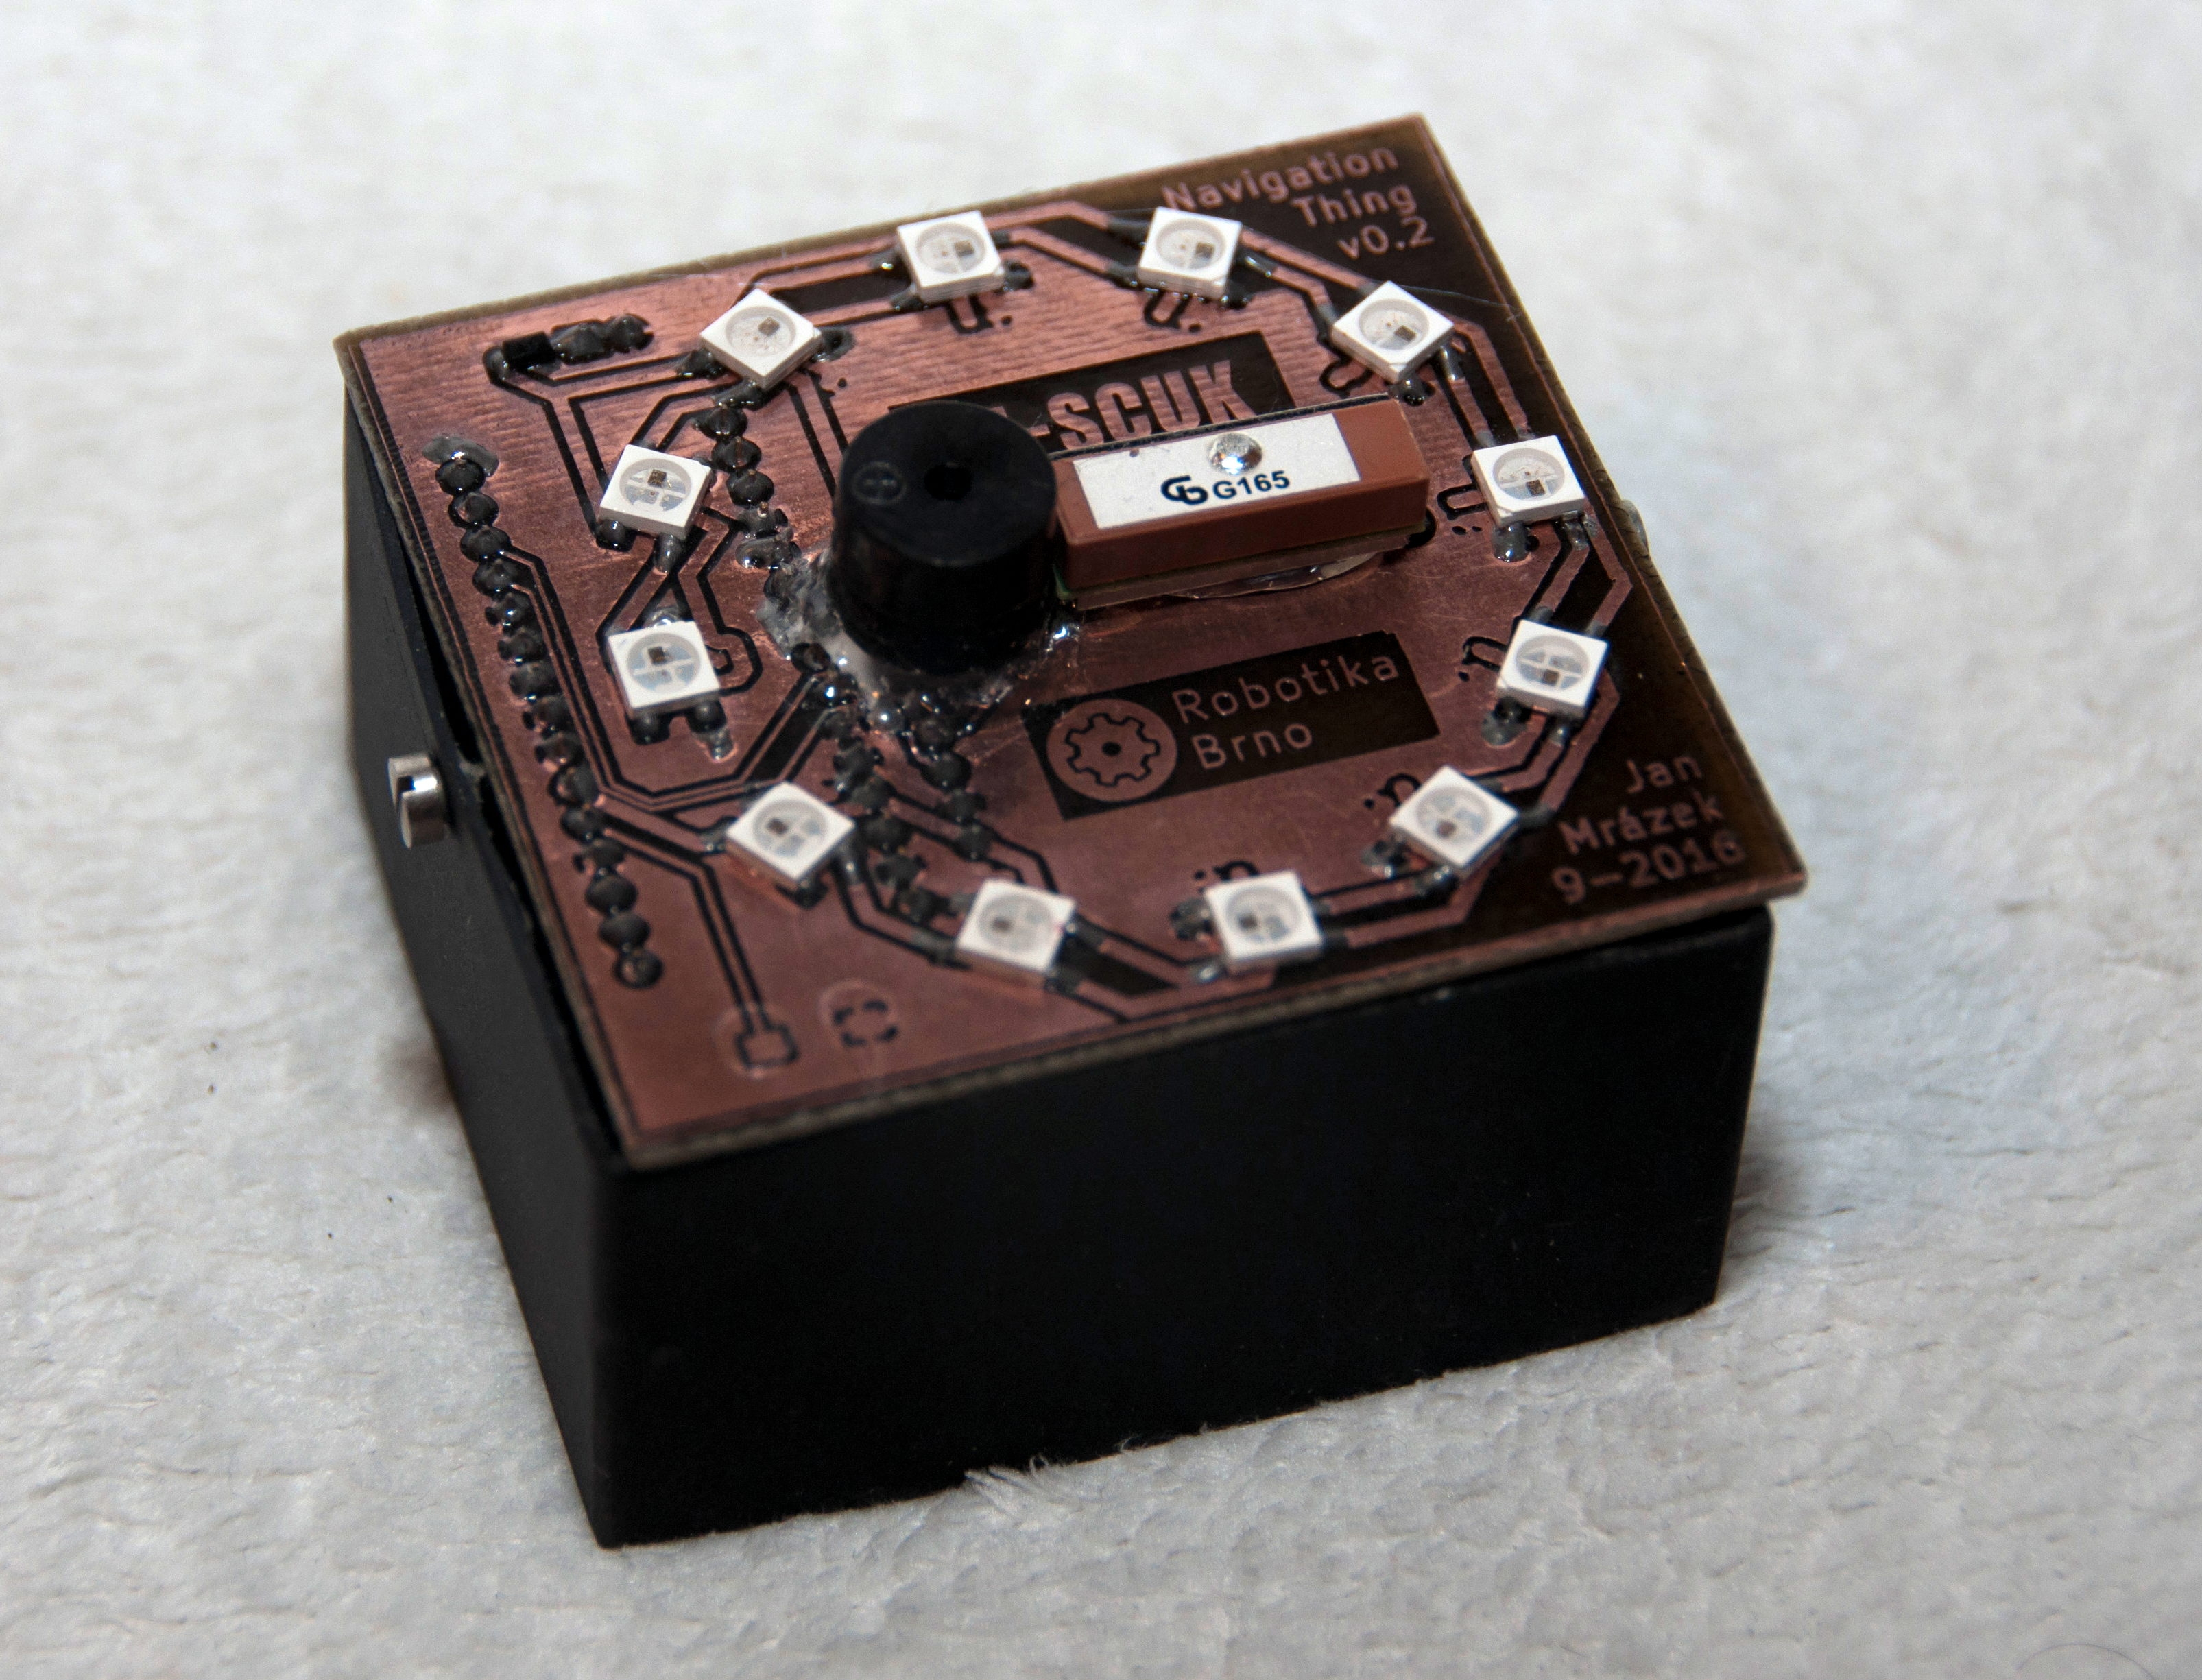
Meet the NavigationThing
I decided to name the device in an extremely original way — the NavigationThing (during the game it was actually named KTTK — K-SCUK Terrain Training Kit). This device is easy to use — you simply inserter 4 AA batteries, calibrate internal compass, wait few seconds for a GPS fix and then you follow an electronic compass and beeping to find your target. Easy to use. No complicated features.

Behind the scenes
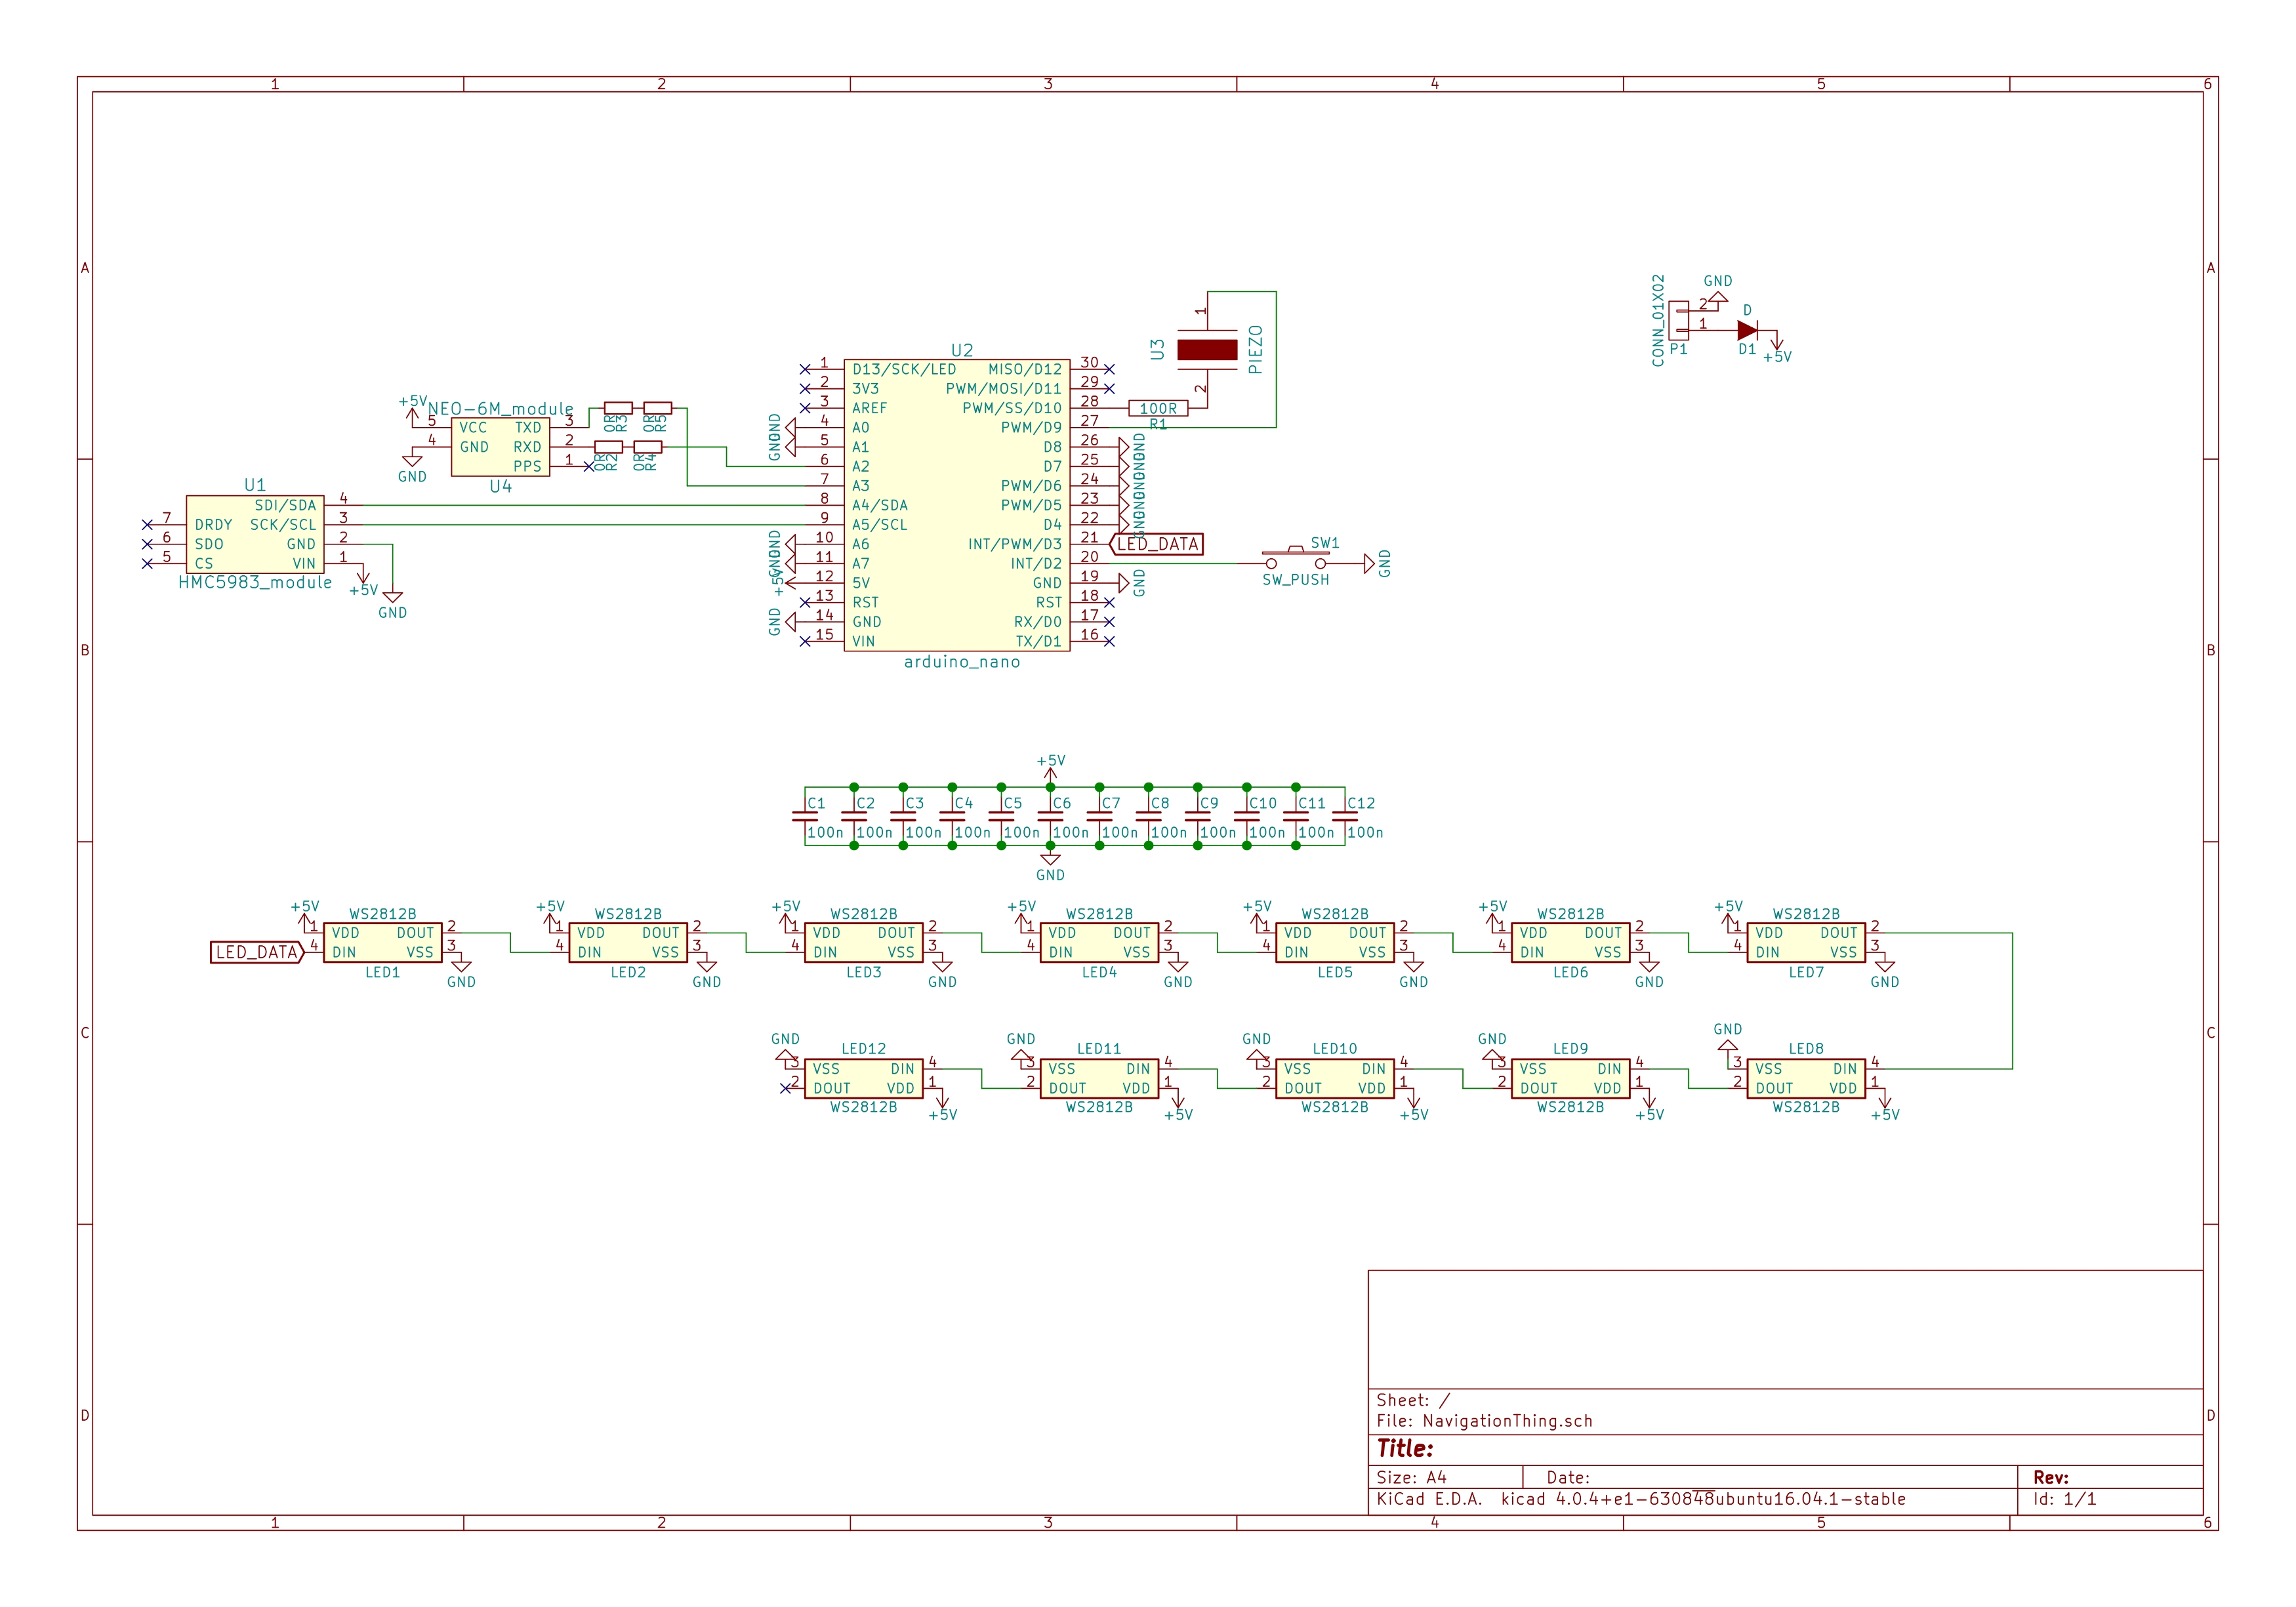
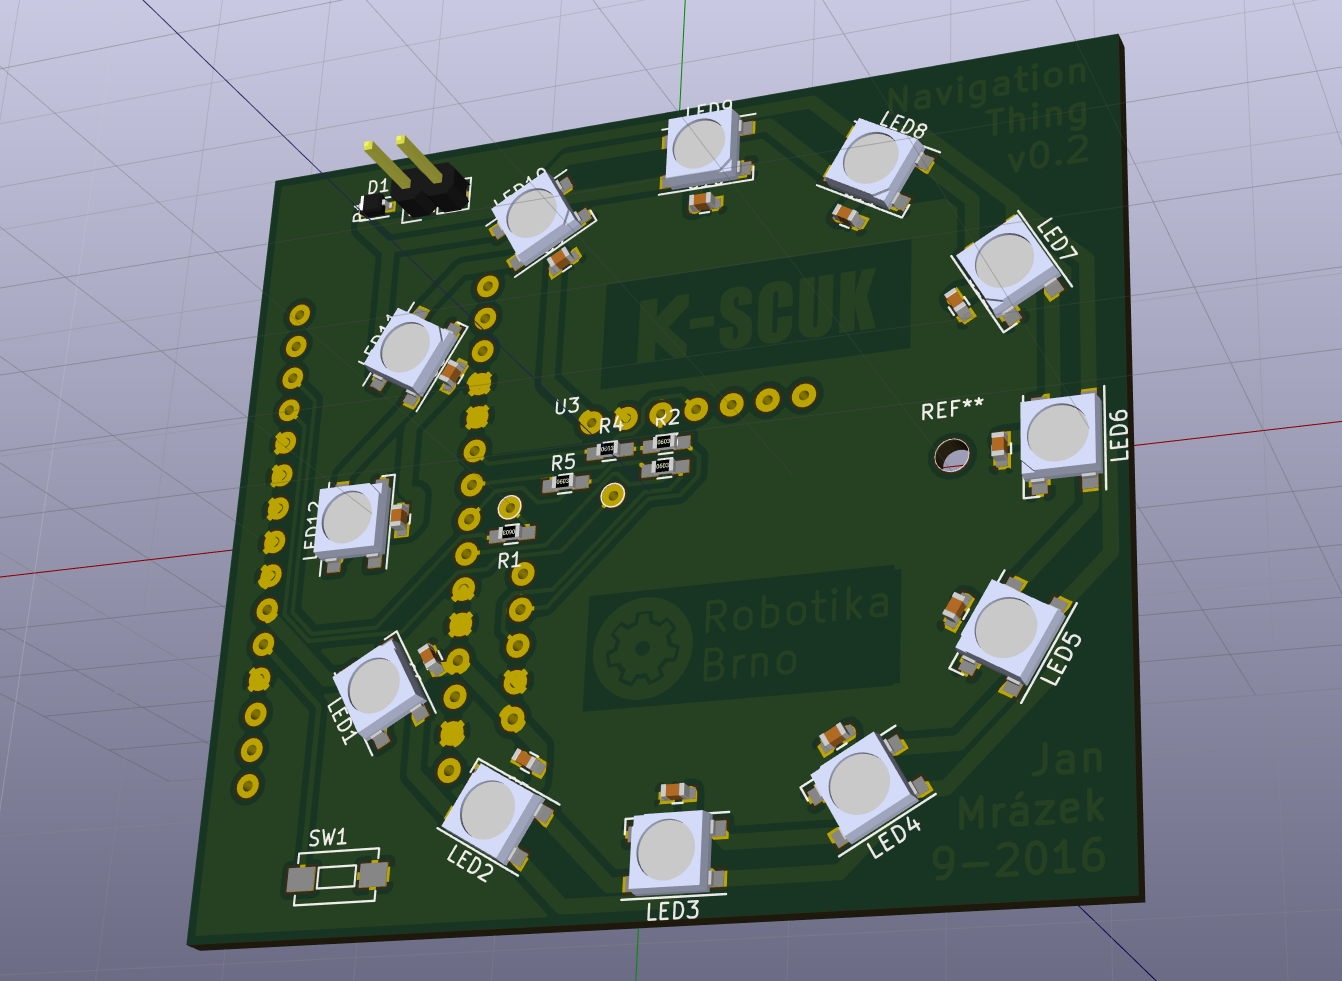
The device is fairly simple — Neo-6M GPS module is used for determining of the position, HMC5983 is used for electronic compass, 12 WS2812 LEDs are used for direction indications and everything is powered by an Arduino Nano. Everything in design was subject of simplicity (as there were only 4 days for device completion) and price (as 6 units were needed).
To connected everything together and to provide mechanical stability at the same time, I designed a simple single sided board in KiCAD. Schematic and board layout can be found in the project repository.
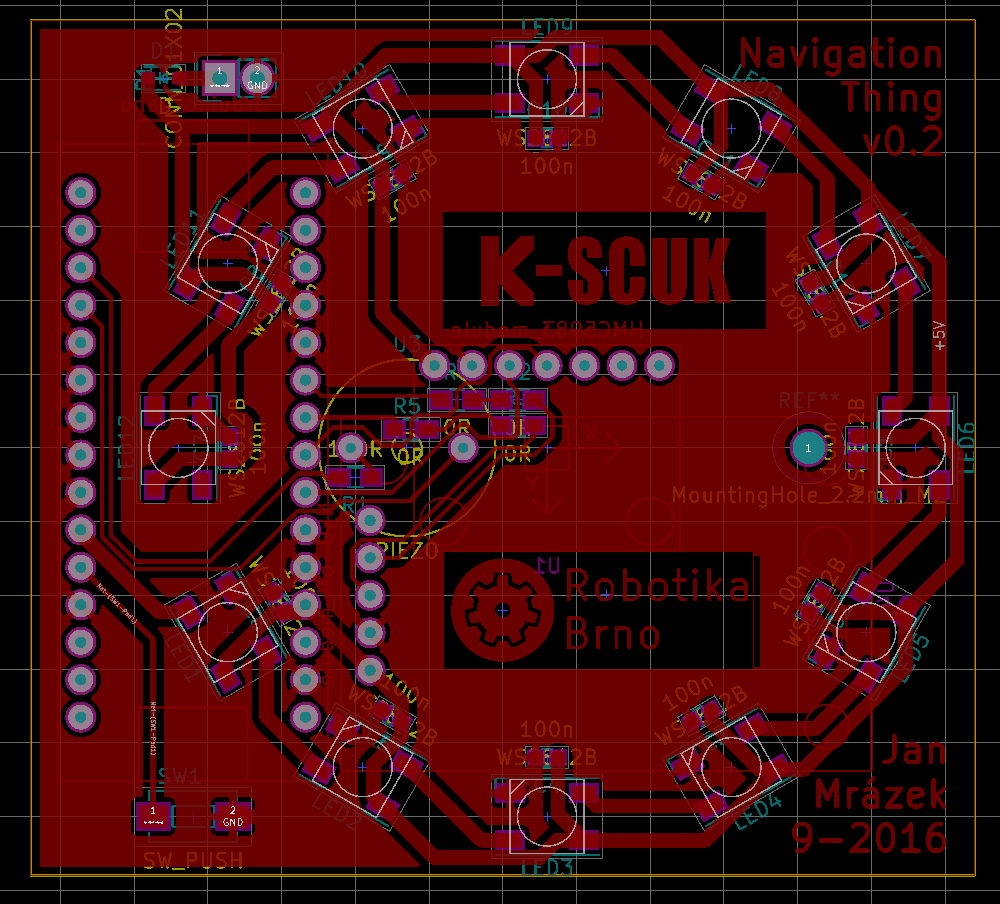
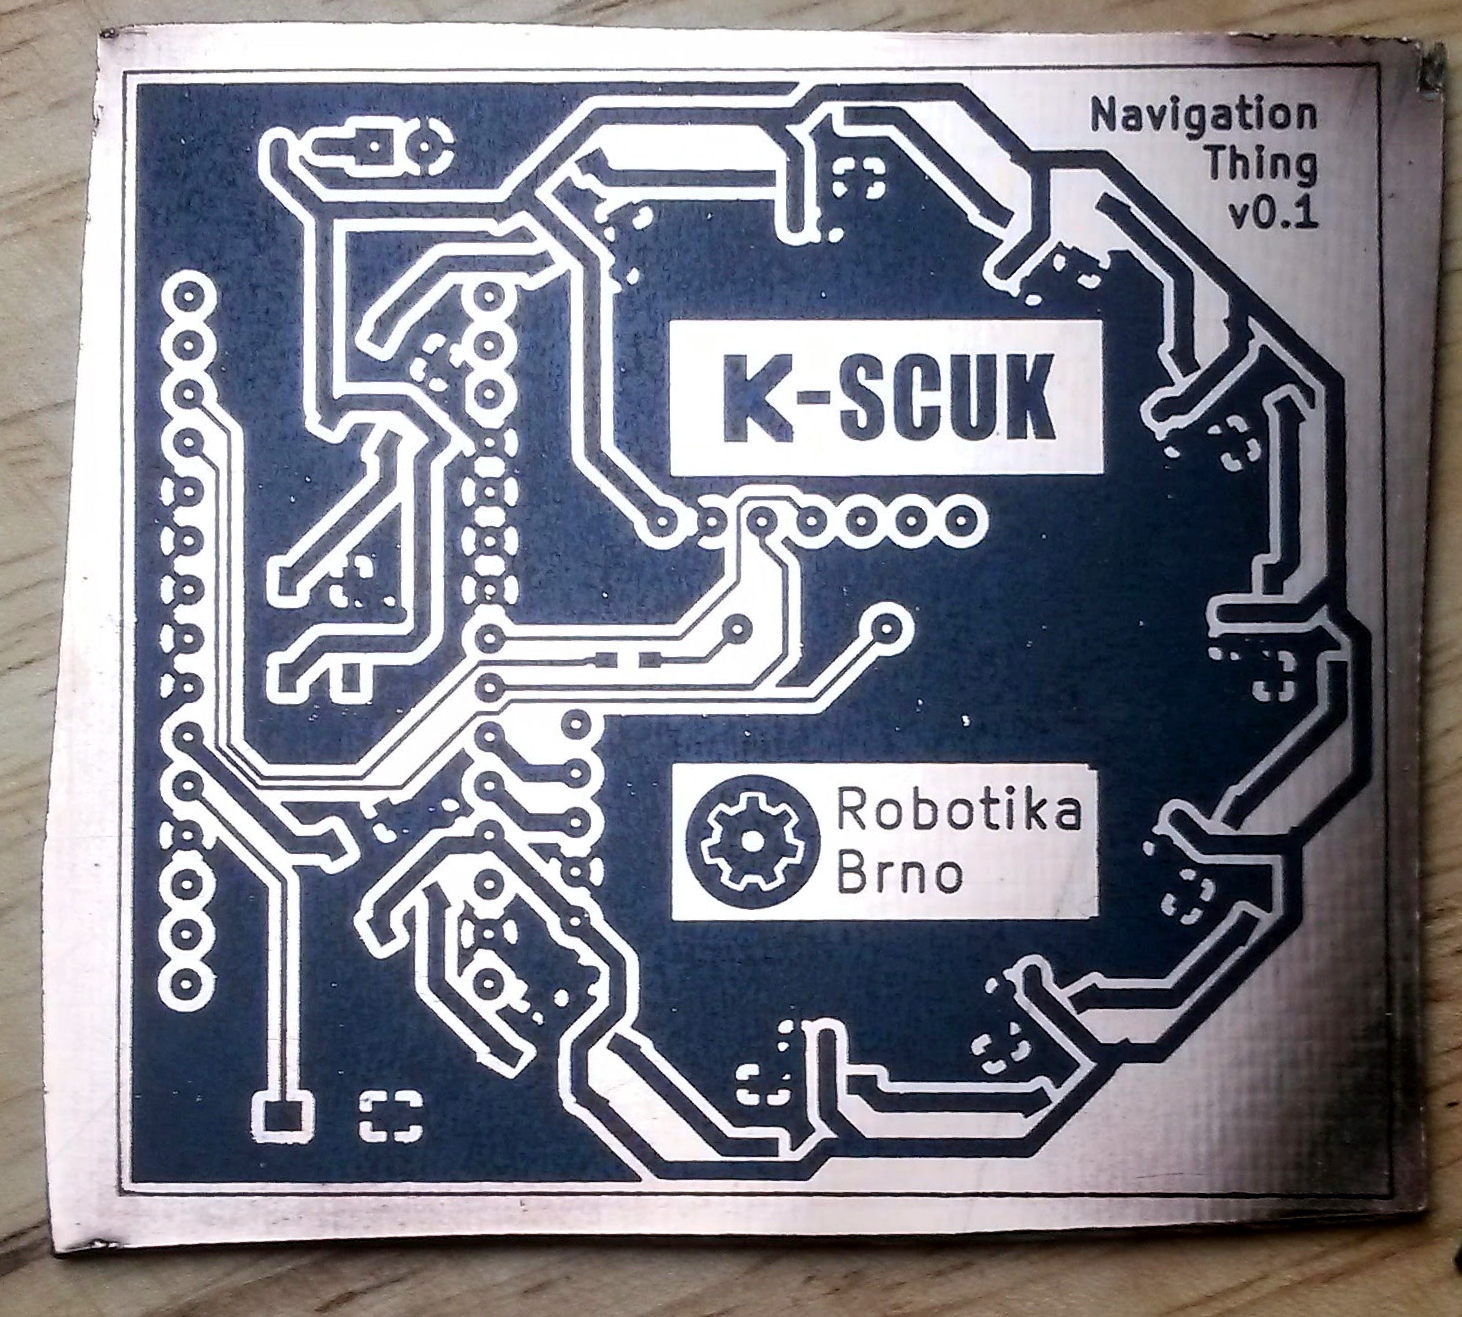
As there was no time to manufacture the boards professionally, I decided to make them home. I used to manufacture boards with photo-resists method, however as I discovered amazing paper for toner transfer method (the paper peels of easily without any water added), I started to prefer it, as it usually gives me even better results than photo-resist (and is much faster). The boards came out perfectly.

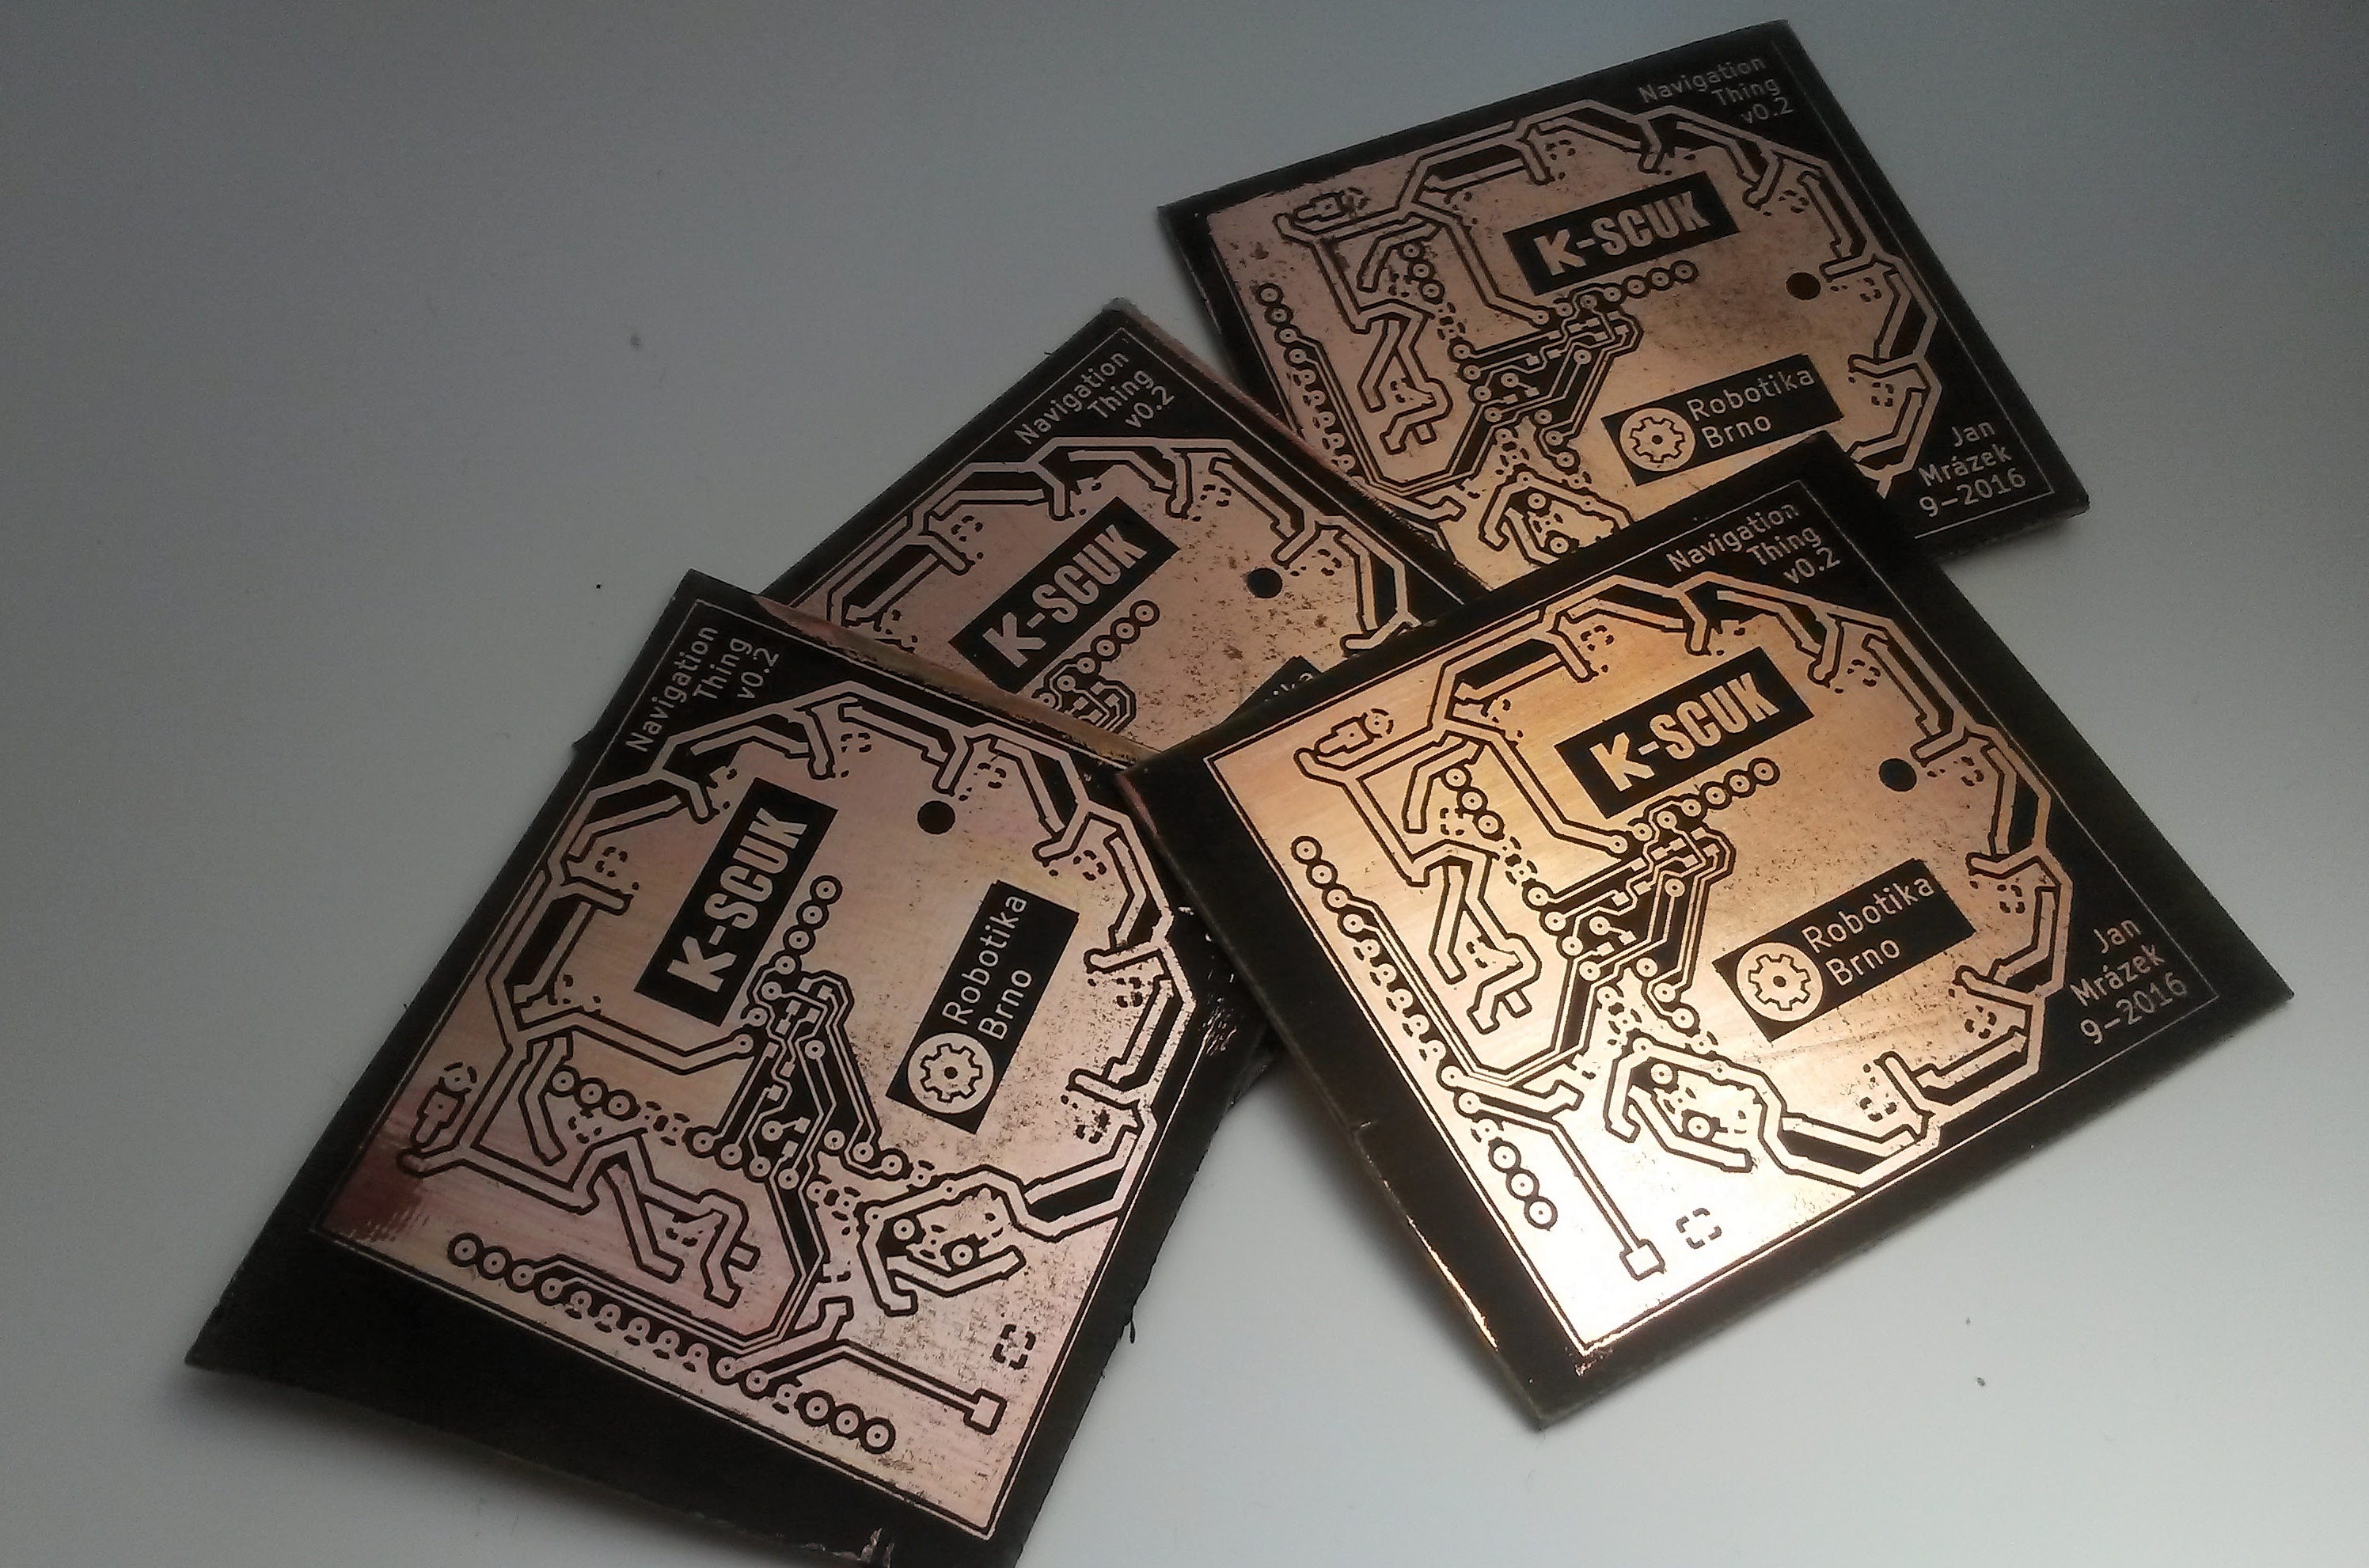
Even I have a good experience with home made solder mask using UV-curable paint, I decided not to use it, as it hides all the traces on the PCB and the PCB becomes a flat surface. I liked the “technical look” of the board. I thought it might look nice for the participants. Instead, after populating, testing and cleaning the boards I tried to cover it in transparent acrylate paint. The result is fabulous — the board is nice and shiny, water protected and feels nice, when you touch it. I will probably use this technique for home-made PCB finish in the future.
How to box it?
Boxing home-made electronics in a nice way is hard, but it usually doesn’t matter. This project is different — it is meant to be used by many regular users, so it should be fool-proof and nice looking. I decided to go with easy way — use PCB as a top cover and battery holder as the bottom cover, so I needed to only manufacture the side walls. To do that, I used 0.5 mm thick polystyrene board from an old advertisement board. Polystyrene in this board is not extruded, so it has a similar look and properties to polyethylene boards. The only differences are that it can be easily formed when heated and it can be easily glued.
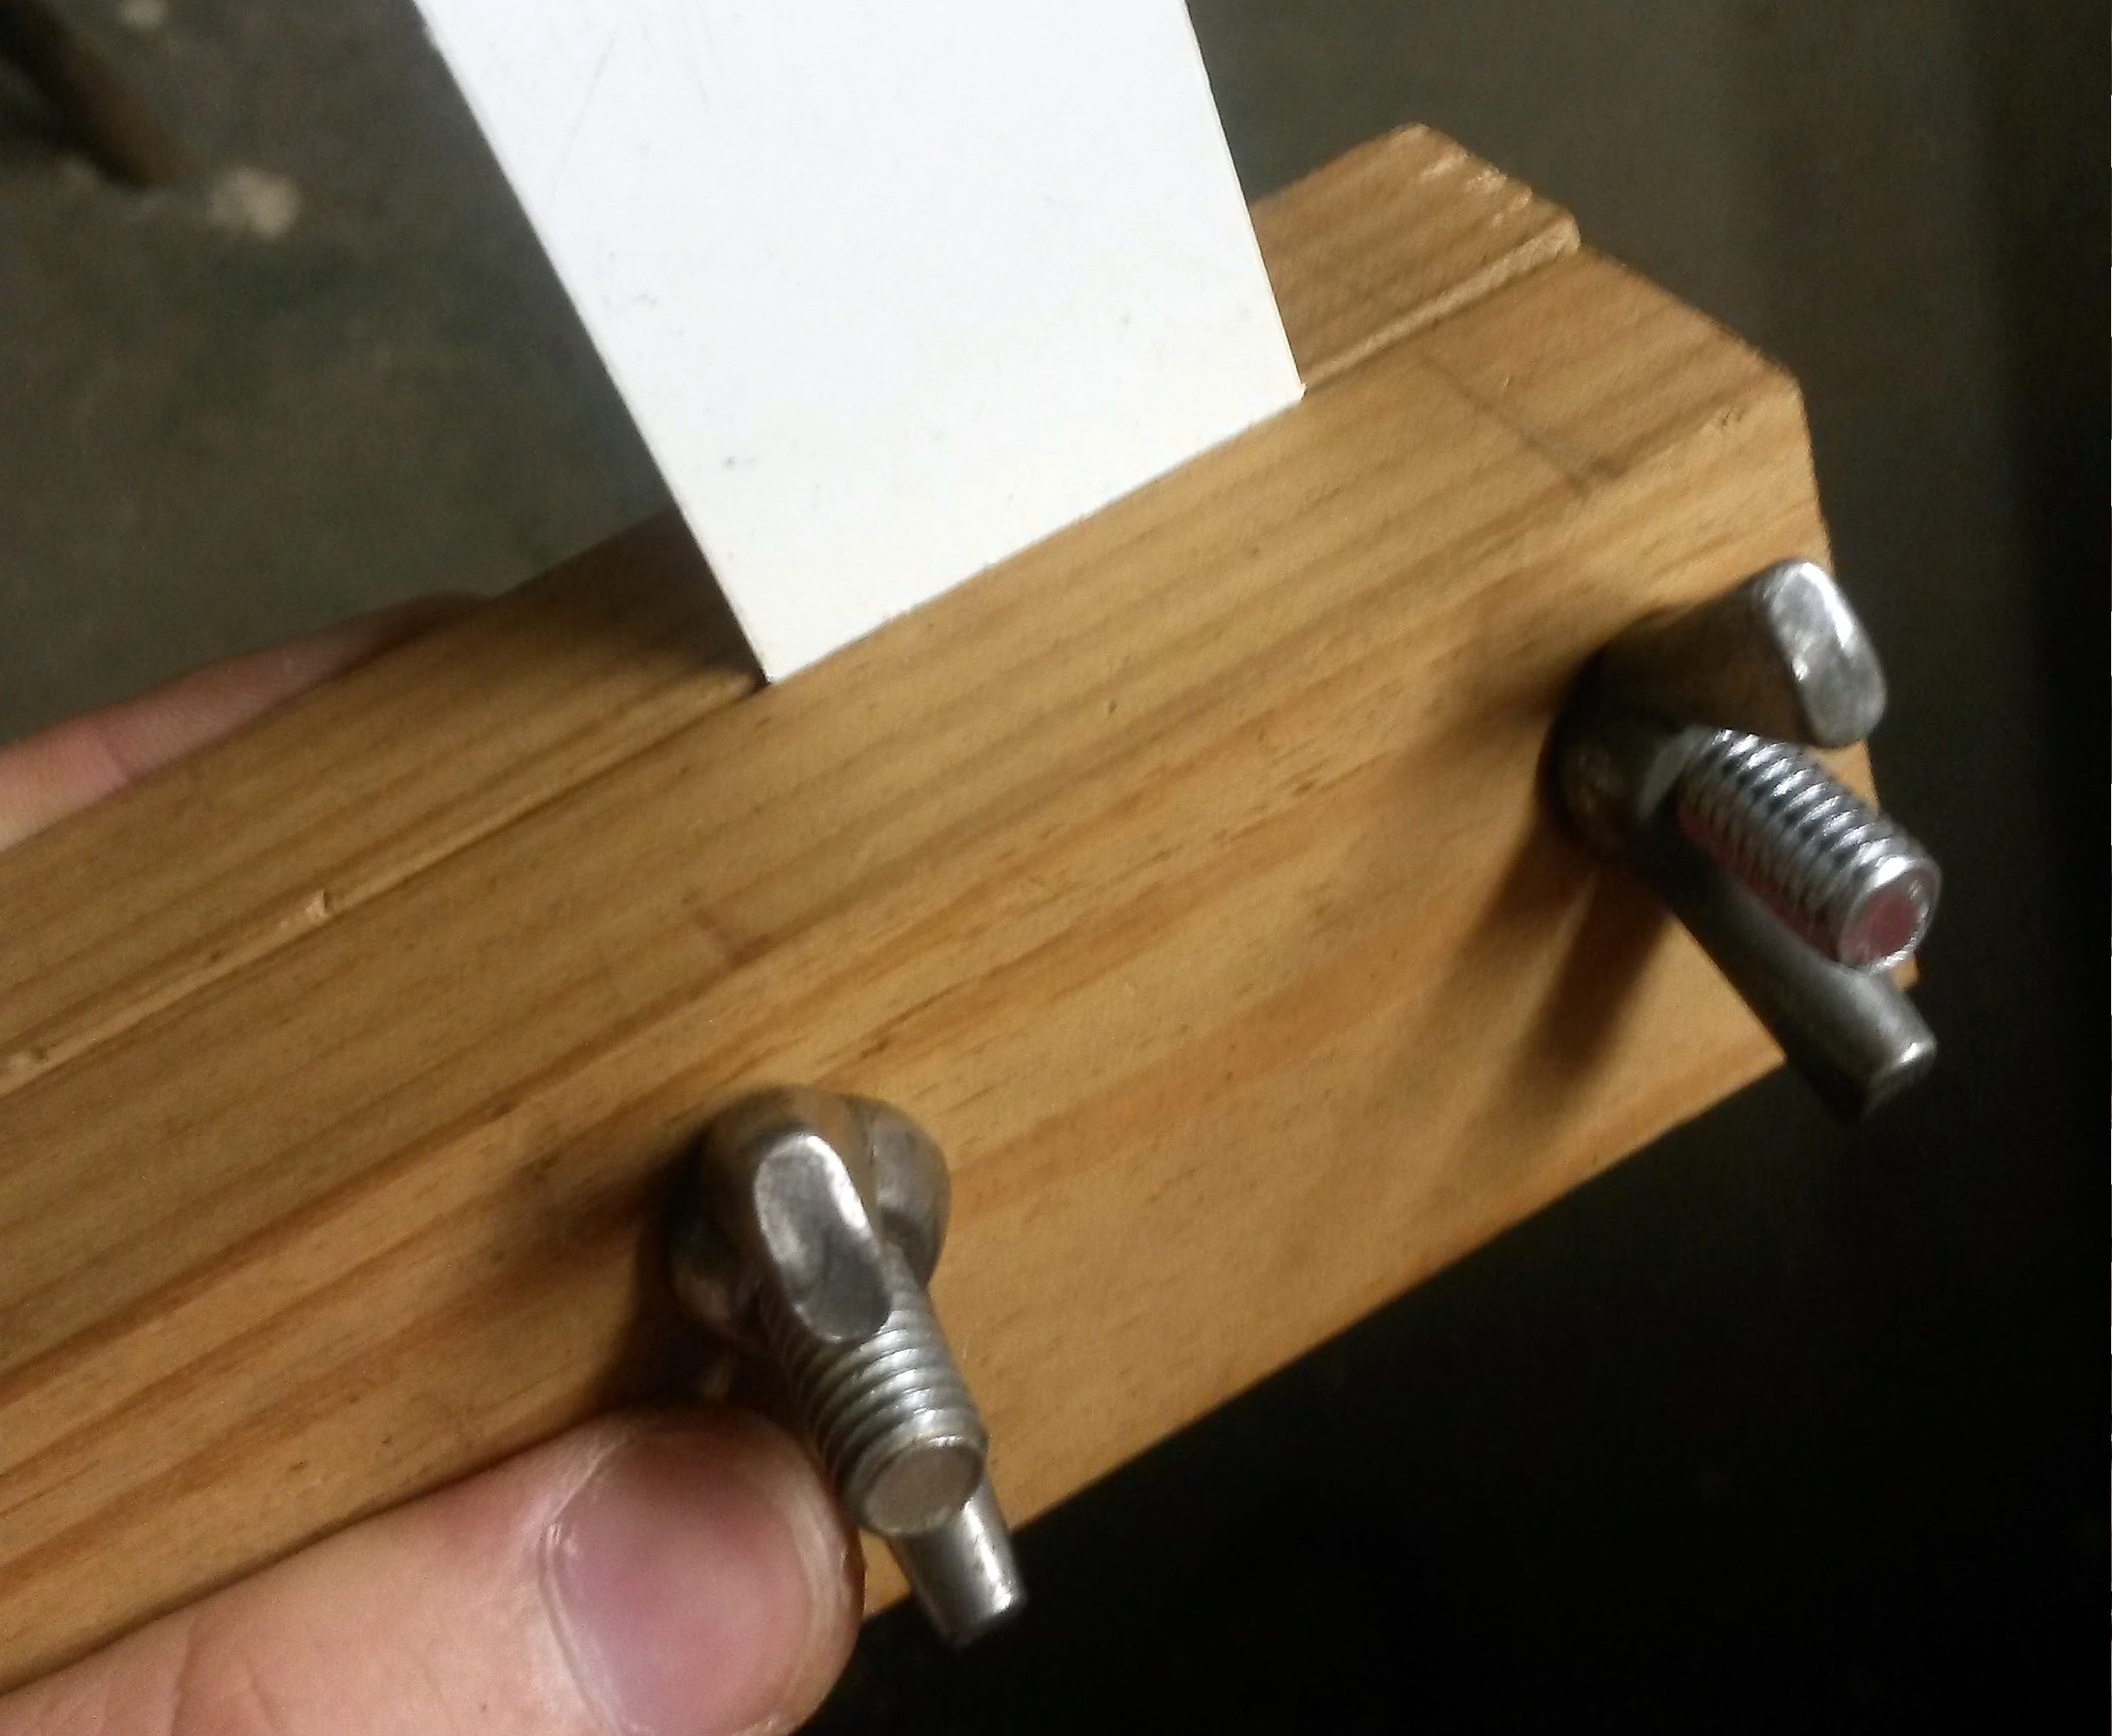
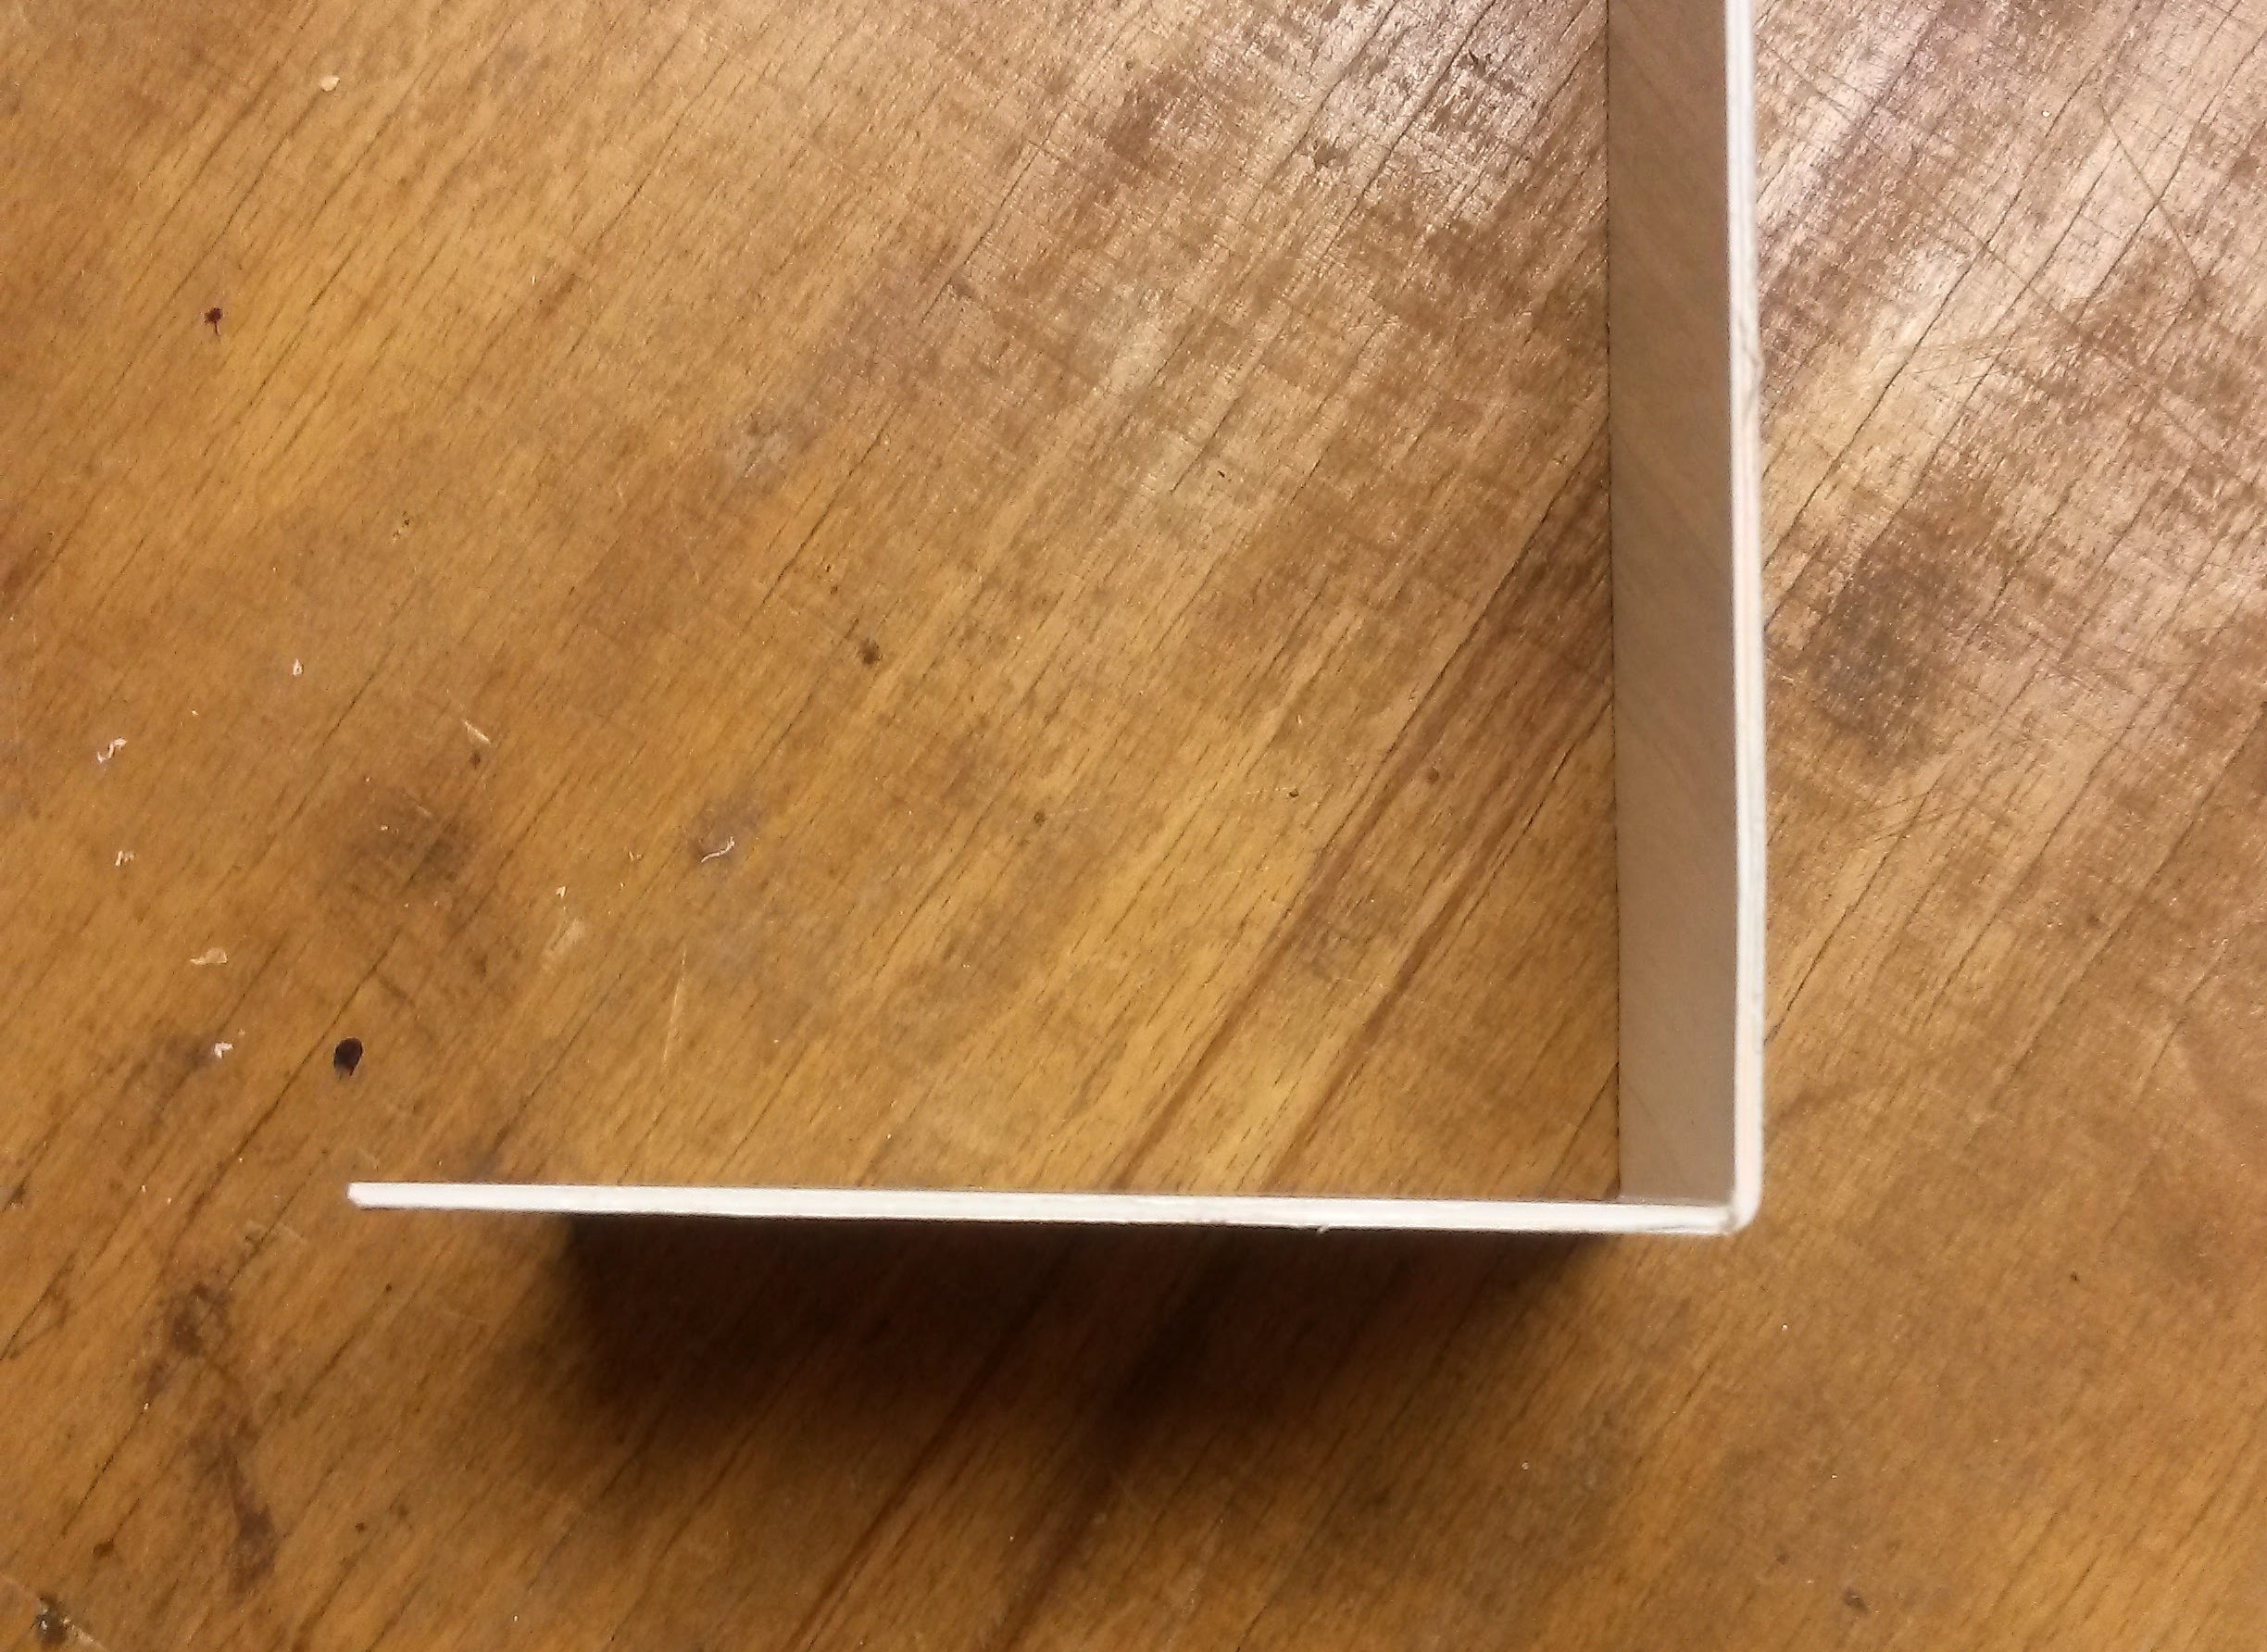
I made a tool for bending a polystyrene strip in 90° angles. It is formed of two wooden slats and two screws. When you want to bend a strip, you place in between of the boards and pinch it together. Then you clamp it in vice, use hot air gun to heat the sheet, until it becomes tractable and then you bend it. After cooling (about 5–10 s) the process is finished. Your repeat the process 3 times and you get a nice looking box.
After bending, I cut remaining material out and glued the remaining corner together. Then I used sand paper to make it smooth and a black acrylate paint in spray to give it a nice dim black finish. The boxes were almost done. I glued the battery holder to one side of the box using a hot glue and the PCB was mounted using 2 M3 screws.


Software
Navigation Thing firmware was written in Arduino to ease the development, as there are all libraries necessary: TinyGPS++ for GPS NMEA output parsing, HMC5983 library for the magnetometer and FastLED library for handling WS2812 LEDs. I thought the software would be a piece of cake, but I run into two issues (which I luckily solved in time).
Beep — but how fast?
“Beep faster as you are getting closer to waypoint” seems as a an easy task. But it isn’t as easy as it sounds. When I used simple linear relation between distance and period, the navigation felt strange, it was hard to guess, if I am getting closer. This is probably due to the fact, that almost all human senses sense in a logarithmic way — e.g. you if you have two pairs of light sources, which differ in the same percentage of brightness, you cannot easily tell the difference between lights in the lighter pair. But it easy for the darker pair. So I tried a quadratic dependency — when you are far away, the change of period is smaller compared to the change, when you are getting closer to the point. With this setup, the navigation felt much more natural. Also I limited the maximum period — when you are further than 1 km from the waypoint, beeping does not change anymore.
Help me — magnetic fields are everywhere!
In my previous article, I shortly described my troubles with a not-so-piezo buzzer. After solving this issues I thought all troubles are gone. I couldn’t be more wrong. When I was testing the unit in the final terrain, I noticed the compass is not working as smoothly, as I expected. I didn’t have a clue what is wrong. I was also suspecting power trails near the final route, but my phone showed correct direction. After few hours of observations I noticed the cause of compass troubles — AA batteries. Every battery is a little bit magnetic and every battery is magnetic in a slightly different way. So it depends, in which order you put batteries in. Solution was easy — just calibrate the compass every time new batteries are inserted.
Conclusion
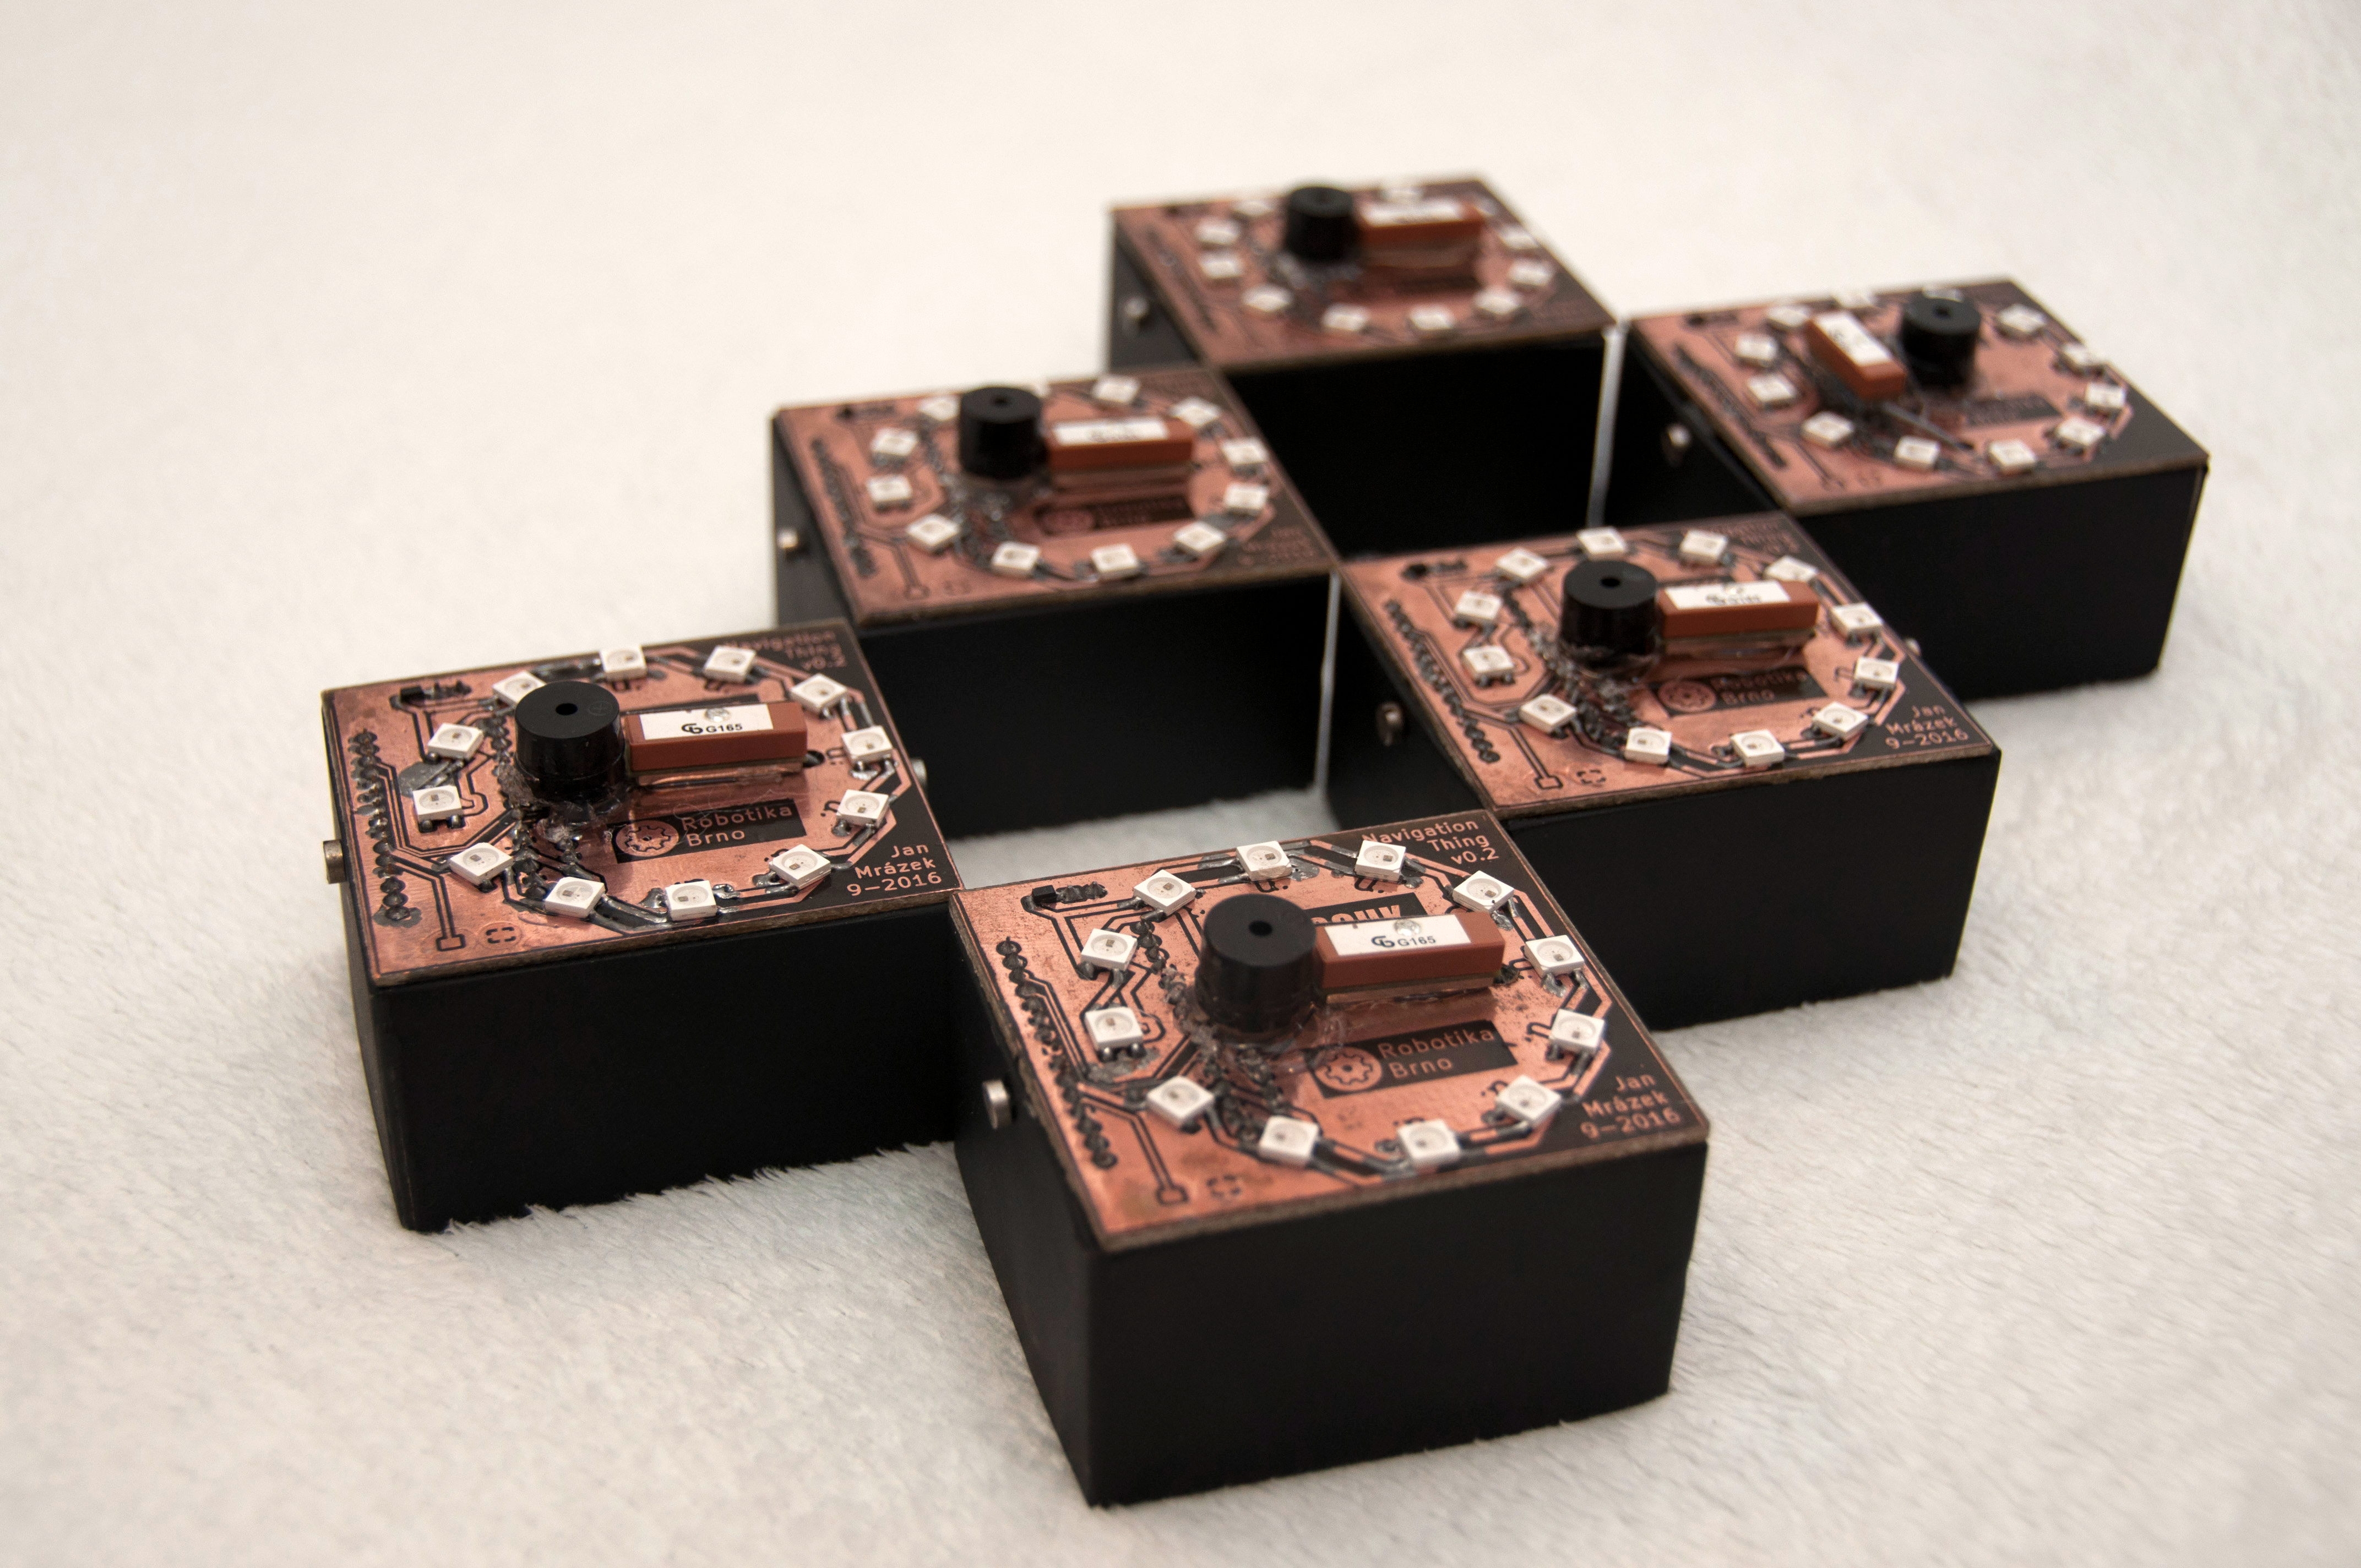
I am glad to say, that all 6 pieces of the Navigation Thing worked smoothly — even it was a quick project with noticeable amount of hacking. What I learned? It is worth it to write firmware for hardware test, when you make more than one piece of a board. It makes your work much easier and you can spot errors in the board population right away. I also found out, that almost everything is at least a little bit magnetic and it is a nonsense to try use an electronic compass without calibration.
If you are interested in the Navigation Thing, there are currently 6 pieces of the unit manufactured and these units can be lent, if you are interested and you are willing to get them and return them in Brno, Czech Republic. The units can be easily reprogrammed.
All resources for the Navigation Thing can be found in the project repository.
Recent news: My open letter to the 3D-printing community
I love the 3D-printing community, but I think there is room for improvement. Let's get better in 2023! Read the full letter.
Support my work!
If you like my work (these blog posts, my software and CAD models) and you would like to see more posts on various topics coming, consider supporting me in various ways:
- You can become my sponsor on Github.
- If you prefer, you can also become my Patreon.
- You can buy me a coffee on Ko-fi,
- or you can buy something from my Tindie store (also see below),
- Or you can just share my work!
If you are interested in knowing what I am up to and recent sneak-peaks, consider following me on social media (Twitter, Instagram, Facebook).
My store offers
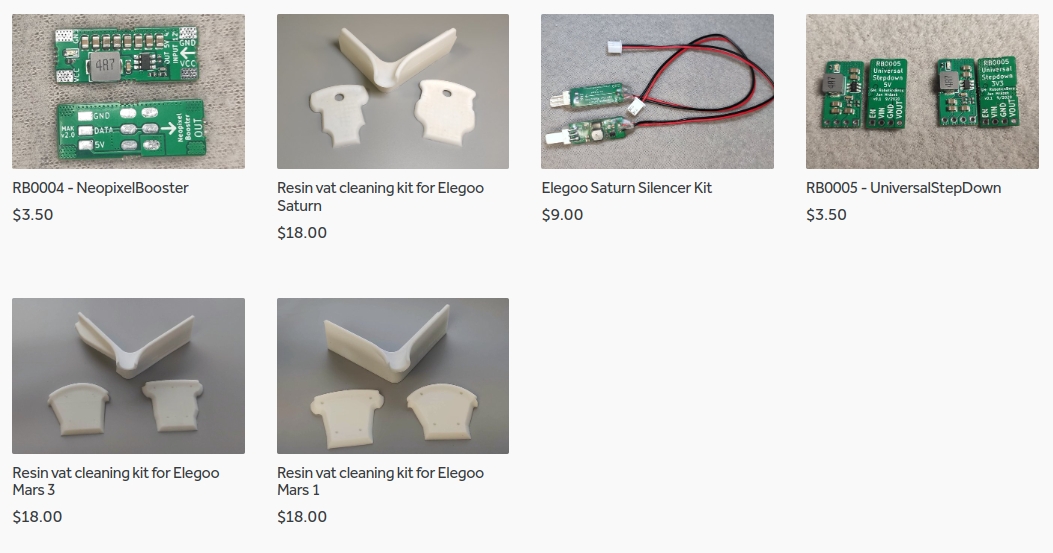
I launched new tank cleaning kits for Elegoo Saturn, Saturn S, Mars 1, and Mars 3. You can find them in my store.
“… I discovered amazing paper for toner transfer method …”
Care to share about the specifics of that paper ? If it’s available where I live, I’d love to get the information. Thanks – and, oh btw nice article ^_^
This is the paper I use: https://www.aliexpress.com/snapshot/7208667395.html?orderId=71952575856643&productId=982374473