After half a year I finally released version 1.0 of KiKit. You might ask – what is KiKit? KiKit is a tool for automation of the manufacturing process of your boards designed in KiCAD. It makes the process fully automatic, repeatable and less error-prone. It basically allows you to:
- Create panels of your boards (without any limitations on board shape). You just run a command and that’s it. No more hand-drawing of panels!
- You can quickly export files for manufacturing. KiKit comes with presets for various manufacturers, so you just invoke a command and you get the correct settings for gerbers, it can also export BOM and POS files according to the manufacturer specs. It can also check DRC for you and it does not generate any files in such a case. Therefore you never submit faulty gebers for manufacturing.
- It can also export stencils – either files for manufacturing of steel stencils or it can export a 3D model of a stencil that you can 3D print.
- You can automatically run DRC in CI hooked in your repository – in that case you will be notified via e-mail, that you committed something, that does breaks the board.

KiKit also simplifies some parts of the workflow, where KiCAD struggles – e.g., batch hiding of references or multi-board projects.
So what is new in the current release?
KiCAD 6, Windows and Mac support
I tried to support the nightly of v6 builds from the beginning, but once a Python API regression occurred, I gave up. Fortunatelly, with the great help of Jon Evans from KiCAD dev team, I was able to adapt to the new API and finally, we support both, KiCAD 5 and KiCAD 6. The plans are to drop v5 support within the next year or so.
KiKit will be also available via PCM in KiCAD 6, however, at the moment it was not approved for the official repository yet. However, due to the limitation of PCM, you will still have to open a terminal and enter a command to install all KiKit’s dependencies.
With KiCAD 6 change in Python packaging, KiKit now natively works on Windows! It should also work on macOS, however, we were experiencing problems before the final release. I hope these one will be resolved soon.
For details, please refer to the installation guide.
New CLI
KiKit originally started as rather a library that you can use to quickly create a panel. However, from the beginning it included a simple CLI interface that allowed you to create single board panels. This CLI interface targets at covering 95 % of the use cases (and for the rest you should write a simple Python script). However, with introducing more and more functionality, the CLI interface was becoming too complex. Therefore, I come up with an idea for a new one.
The new interface abandons standard command line flags like --mousebites or --frame and instead, uses a configuration file to specify the panel. The configuration file consists out of sections grouping parameters for given aspect of panel, e.g., layout, cuts, framing and more. Each section has a mandatory parameter called type. The type dictates the style of the feature; e.g., you can say type: mousebites for cuts or type: railsTb for framing. Based the type you are allowed to specify extra parameters, e.g., the drill size of the mouse bites. Given this you can have configuration like this:
{
    // There can be C-like comments
    "layout": {
        "type": "grid",
        "rows": 1,
        "cols": 1,
        "hspace": "0mm",
        "vspace": "0mm",
        "rotation": "0deg",
        "alternation": "none",
        "renamenet": "Board_{n}-{orig}",
        "renameref": "{orig}"
    },
    "source": {
        "type": "auto",
        "tolerance": "1mm"
    },
    "tabs": {
        "type": "normal",
        "source": "none"
    },
    "cuts": {
        "type": "none"
    },
    "framing": {
        "type": "none",
        "thickness": "0mm",
    },
    "post": {
        "type": "auto",
        "millradius": "0mm",
        "copperfill": false
    }
}
Writing a file for each panel would be laborious, so instead, KiKit comes with the concept of configuration composition. Basically, you start with a default configuration and then the files can override specific parameters of the sections. This allows you to, e.g., create a file jlcpcb_mousebites.json that has the right drill size and just use it: kikit panelize -p jlcpcb_mousebites.json -p myPNPmachineFraming.json myBoard.kicad_pcb panel.kicad_pcb.
Better, but laborious. Therefore, you can override the keys in place – --<sectionName> 'parameter: value'. So a full-featured KiKit panelization commands looks like this:
kikit panelize \
    --layout 'grid; rows: 2; cols: 2; space: 2mm' \
    --tabs 'fixed; width: 3mm; vcount: 2' \
    --cuts 'mousebites; drill: 0.5mm; spacing: 1mm; offset: 0.2mm; prolong: 0.5mm' \
    --framing 'frame; width: 5mm; space: 3mm; cuts: both' \
    --post 'millradius: 1mm' \
    doc/resources/conn.kicad_pcb panel.kicad_pcb
The new CLI scale well – we can add new panel features easily without making it messy. If you would like to read more about it or see it in action, check out the documentation and examples.
New tab algorithm
We also reworked the algorithm that generates tab. The original idea of shooting rays was preserved, but it was improved. Instead of direct shooting the rays, we first place annotations on the board edge showing the intention of placing a tab here. In the second step we render these annotations into tabs. This decouples tab placement from the actual tab building and therefore simplifies making tab placement algorithm. The annotations with the new CLI allowed us to create a several strategies of placing tabs. We can now either spread given number of tabs across the perimeter or place tabs within a given distance. We also support corner tabs. If you are interested in knowing the details, see documentation.
The new algorithm also allowed us to implement backbones in the panels.
User annotations
We often found us in a problem of the need to precisely specify tab location. This is quite hard to specify from code and the original idea of having lines to denote tab placement was unintuitive. Therefore, we introduced the KiKit footprint library that allows you to place annotations directly to your board in the form of special footprints. There are two annotations currently: tab placement and board marking.


The tab placement is intuitive – you place it where you want your tabs. The board annotations allows you to give a name to specific board outline. This is useful, when you work on multiple boards coming from the same schematics – you can draw all your board in the same file, give them names using this footprint and then separate them using kikit separate. You can read more about the multiboard projects here.
Automated DRC checking
KiCAD 6 introduces at least some API to run DRC so we added a command to trigger DRC from CLI. This allows you to integrate DRC to your CI workflow and e.g., send a notification e-mail when you commit a board that does not pass DRC.
DRC is also by default run before producing output in the fab command. Therefore, you shouldn’t be able to accidently send DRC failing gerbers to your manufacturer. You can of course turn off the check. Although KiKit aims at producing DRC passing panels, it is not perfect – e.g., when you have two board in a panel that feature a trace with large clearance, it will trigger a false positive. However, I we believe that with the new rule-based DRC we could implement modification of DRC rules such that validations from neighboring boards are ignored. However, for that I first have to get comfortable with the rule-based DRC.
GUI for some of the functionality
We introduced GUI for panelization and batch manipulation of board references.
I often create automatically assembled dense designs, therefore I often want to ommit all references but, e.g., keep the references for connectors or test points. Hiding the references one by one is tedious and error prone (e.g., when you change your footprint in the last moment, because some chip went out of stock), so KiKit can automate this. You just specify regex for all references to show or hide.
The second feature is panel building. Especially the new users often struggle with writing commands. The GUI is just a tool to construct the command (and if you want to actually execute it), but it seems to be helpful. See it in action:
Panelization for @kicad_pcb made easy via KiKit. I have a first working draft of the GUI & Action plugin for KiKit’s panelization module
— Honza Mrázek (@yaqwsx_cz) July 21, 2021
Testers welcomed: https://t.co/6EXptHH005 pic.twitter.com/HW5utUPbkr
Improved speed
KiKit is now almost 2× times faster. Unfortunatelly, when you panel small boards you probably won’t notice it as there is a significant overhead of loading the Pcbnew API (import pcbnew takes about 1.5 seconds on my machine). Nevertheless, panelizing within 3 seconds is still much faster than doing it by hand…
Various small improvements
Along the way towards v1 we also implemented several small features like:
- chamfering and filleting of frame corners,
- adding an arbitrary text to the panel frame,
- specifying copper clearance for V-cuts,
- running user post-processing scripts (e.g., to place extra components or trigger features not available from CLI),
- specifying panel origin points,
- and more
What didn’t make it into KiKit v1
Recently I made a poll on Twitter:
The support for KiCAD v6 was just merged into KiKit – we are on our way to v1! (https://t.co/uq1aQAaMhS)
— Honza Mrázek (@yaqwsx_cz) December 18, 2021
Now I am thinking about what features should I include in the v1 release. What would you like to see? Or do you prefer an earlier release with fewer features?
Based on the poll I decided to release KiKit v1 quickly. Unfortunately, that means some of the new sexy feature didn’t make it into v1. The biggest one is the support for automatic placement corrections. I am really sorry about this one – it was once postponed due to the rework of the CLI and now I was more focusing on getting KiCAD 6 compatibility. But I promise you it will be a part of the v1.1 release!
Also some minor features like V-cut offsets, setting panel origins or running kikit fab on project files, nor GUI for other commands (like fab or stencil) didn’t make it. But I hope to implement them soon!
Obtaning KiKit
If you already use KiKit, it should be sufficient to just upgrade it via pip. If you have never used KiKit, simply follow the installation guide and be sure to check out the examples.
If you find something, that is broken or you miss a feature, feel free to open an issue on GitHub. If you have questions regarding the usage, you can use our discussions.
Support KiKit!
If you like KiKit and it saves you time, consider becoming my GitHub sponsor! Having sponsors not only gives me the motivation to maintain the project well but also to focus on implementing/fixing features that I have no direct use for and are only requested by the users. Also, reaching my GH sponsors goal would allow me to properly allocate time to maintain all my open-source projects.
Here I would also say thank you to all my current sponsors. Thank you, guys!
Recent news: My open letter to the 3D-printing community
I love the 3D-printing community, but I think there is room for improvement. Let's get better in 2023! Read the full letter.
Support my work!
If you like my work (these blog posts, my software and CAD models) and you would like to see more posts on various topics coming, consider supporting me in various ways:
- You can become my sponsor on Github.
- If you prefer, you can also become my Patreon.
- You can buy me a coffee on Ko-fi,
- or you can buy something from my Tindie store (also see below),
- Or you can just share my work!
If you are interested in knowing what I am up to and recent sneak-peaks, consider following me on social media (Twitter, Instagram, Facebook).
My store offers
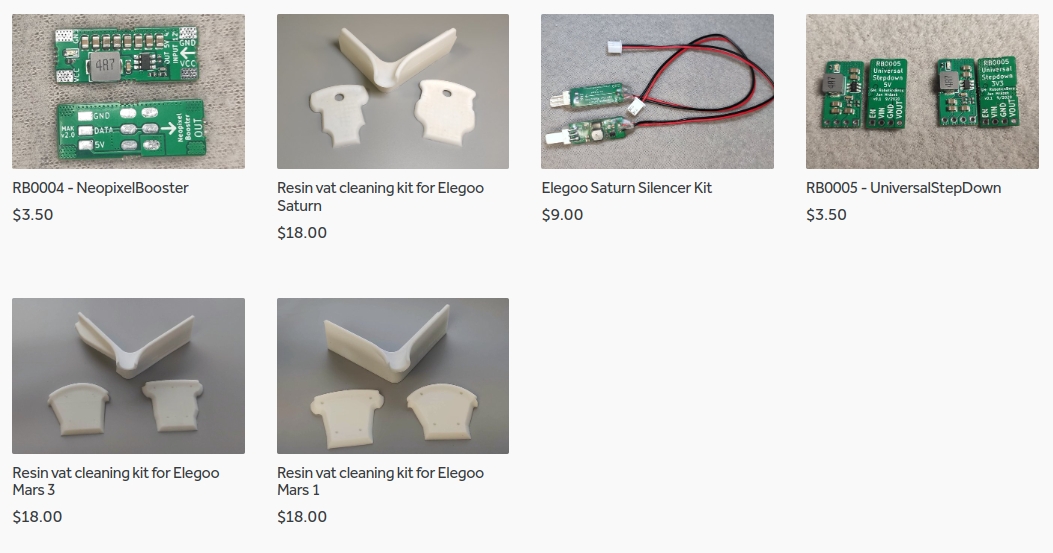
I launched new tank cleaning kits for Elegoo Saturn, Saturn S, Mars 1, and Mars 3. You can find them in my store.
Great work Jan! I’m excited to build a workflow around this.
Is it possible to create a complete configuration file so that I can run without any paramrter? This would be most usefull for guaranteeing that future updates comr out exactly the same
That’s the whole point of KiCAD. You can:
– write a script that includes all the CLI parameters,
– or better write a Makefile (this is an example for v0.7, but public example: https://github.com/RoboticsBrno/RB0004-NeopixelBooster/blob/master/Makefile)
– you can save all parameters into a JSON file as described in the documentation (https://github.com/yaqwsx/KiKit/blob/master/doc/panelizeCli.md) and just invoke it as `kikit panelize -p myPreset.json input.kicad_pcb output.kicad_pcb`.
So far I’m loving KiKit. I keep running into a problem with a round PCB where if I change the wrong setting (I’m not sure if its in the layout, the tab section, or something else) then it will keep returning the no edge found error until I reset the plugins and try again fresh. I’ll try to track down what’s doing what as soon as I get a bit more time.
What I really wanted to say is that I’d really love it if you included copying filled copper zones in a future version. I’m having to place new zones on everything, and then choose the correct nets for all the solid connected pads that exist in the zones. These copper fills were essential parts of the original PCB, so not having that copied too was a bit of a surprise. I looked inside the pcb file to see if I could copy/paste it faster in text, but good lord what a mess a kicad pcb file is. For now I’m mousing my way through. That would be my vote for next upgrade.
If you have PCB where I can reproduce the “no edges found,” I will be happy to look at it. If you miss your copper-filled areas, you probably don’t have a large enough tolerance parameter – see https://github.com/yaqwsx/KiKit/blob/master/doc/faq.md#kikit-throws-away-components-from-my-panel-how-can-i-prevent-it
Hi Honza,
I’m wondering how to add the Tab annotations in KiCad6.0.2.
Is there a specific ‘footprint’ library for KiKit? or shall I do text and arrow drawing manually on F.Fab layer?
Thank you, Jean
KiKit resources are located in C:\Users\user\Documents\KiCad\6.0.5\3rdparty\Python39\site-packages\kikit\resources directory.
Open KiCad:
from Schematic Editor: Preferences → Manage Symbol Libraries…
from Board Editor: Preferences → Manage Footprint Libraries…
Now looking why Tabs annotations entered in mySingleModule.kicad_pcb are not found by KiKit…. will let you know.
There is KiKit library available for download via PCM in the libraries section.
As examples page says: “We also have to increase the source area tolerance, so it can capture the annotations.” Correct
I placed the Tab position at 0.4mm from the EdgeCuts and set Source Tolerance to 4mm. Works fine. Thanks.
And remember: RFM before boring Hanson 😉