Back in high school, I wrote SOČ (student-paper) about designing and building a small horizontal wind turbine (available here, only in Czech). It was an interesting experience and I learned a lot about aerodynamic. Ten years passed and I decided to revisit the idea of having a small DIY wind turbine. However, with a modern spin on it in the form of 3D printing the whole full-scale turbine on an SLA printer. Spoiler: it turned out perfectly!

The Old Design
Before I dive into the process of making a new turbine, let’s briefly recap the design and manufacturing process of the old turbine.
The whole turbine was designed using the Galauert vortex theory. Back in the days, I wrote a simple C++ program, that numerically solved the equations to fnd the right angle of attack and profile lenght of the turbine.
Then I imported the data into Solidworks and designed a model. Then I handcrafted the turbine blades out of styrofoam using a hot wire and a series of templates. The styrofoam blade was glued to a beam out of spring steel. Then it was covered in several sheets of Tyvek (non-woven fabric) soaked in dispersion glue. Basically, it was a primitive form of making a laminate body. Surprisingly, once painted the material is rigid and very durable. It withstood outdoor weather conditions (-20 °C in winter, +30° in summer, a lot of sunshine) for 4 years with no apparent damage. Overall, this primitive manufacturing technique worked, but it was laborious and relatively imprecise. So I decided to print it!

The old manufacturing process - manually cut pieces of styrofoam using a hot wire

"Laminated" blades with tyvek and dispersion glue
Designing a new turbine
10 years passed and I become more skillful, but also a lazier programmer. So instead of revisiting my old primitive program, I did my research and I found out that there is QBlade. QBlade is an amazing piece of software for designing wind turbines. It allows you designed and simulate air profiles and blades. It is really powerful and yet easy to use. Just note there is a version 0.9 on Sourceforge which is vastly improved compared to version 0.8 on the main website. Just to give you a sense what QBlade can do:


With QBlade I can design a turbine. However, to print it, I need a proper 3D model. QBlade allows you to export the blade as STL. However with STL you cannot do much – I need to split the blade into smaller pieces, add infill, holes for transoms, and also to design some jigs to be able to precisely assemble it.
QBlade allows you to dump the critical blade data (profile length and blade twist) into a simple TXT file (an example). So as I (still) use Fusion 360 as my primary CAD tool, I decided to write a plugin that takes this file and builds a model of a single blade. I call it YBlade and I made it publically available on my GitHub. With this plugin, you get the basic blade shape that you can easily modify (add infill, cutouts, etc.).
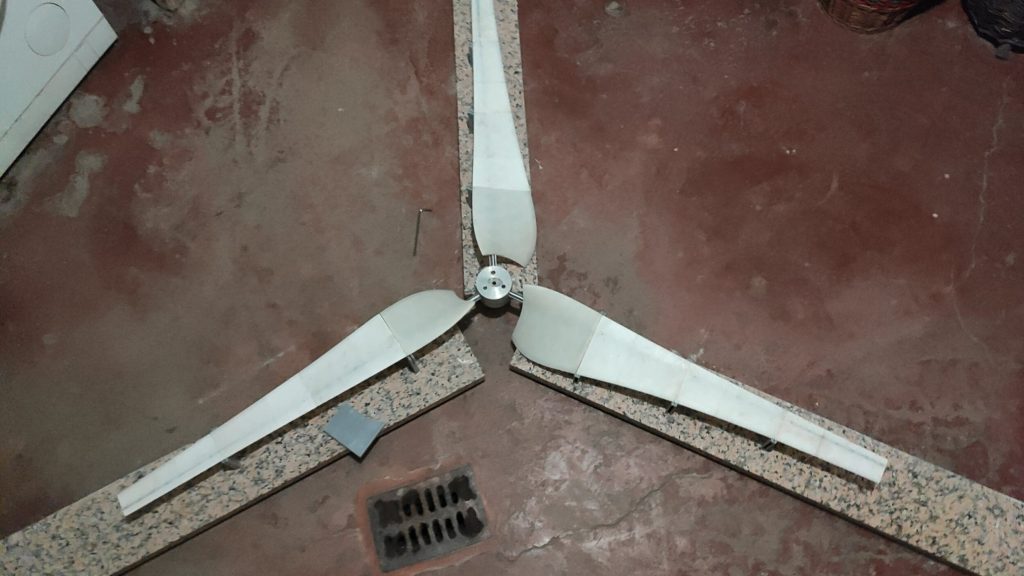
The turbine is designed to have three blades with a diameter of 1.5 m. It uses the NACA4412 air profile. It is designed for tip-to-windspeed ratio 6. In theory, it should provide 80W for 5 m/s wind, 550W for 10 m/s, and 900W for 15 m/s (note that the wind energy increases with the third power of its speed). The computed efficiency should be around 50 % (roughly half of the wind kinetic energy is turned into the kinetic energy of the turbine).
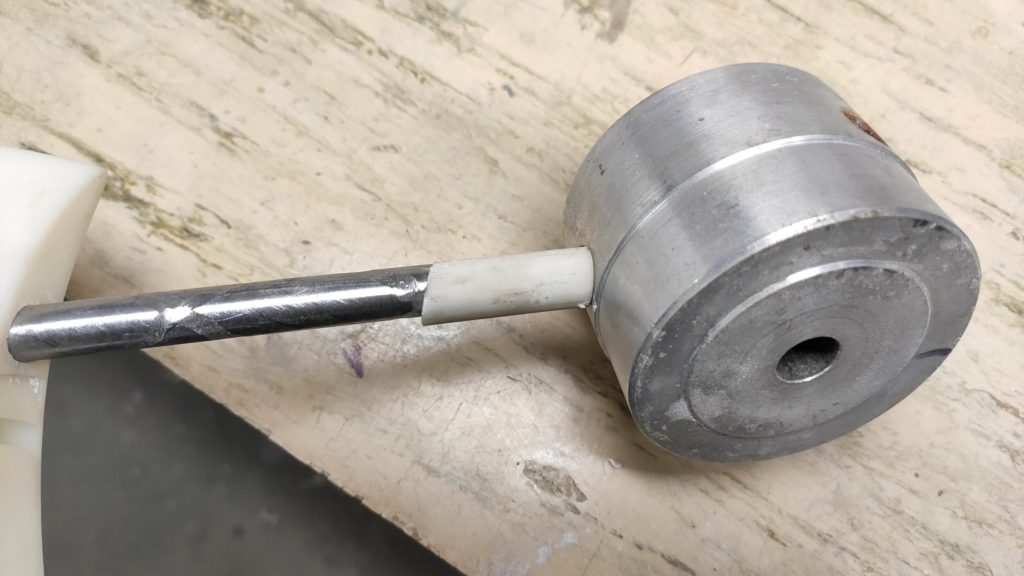
I decided to reuse most of the components from the old design, so I preserved the metal hub and also use the same beams. The whole blade is a thin shell – the outer thickness is 1.2 mm and it has internal diagonal fins spaced 30 mm apart. You can see the model below (note that Fusion 360 wrongly makes the internal fins visible).
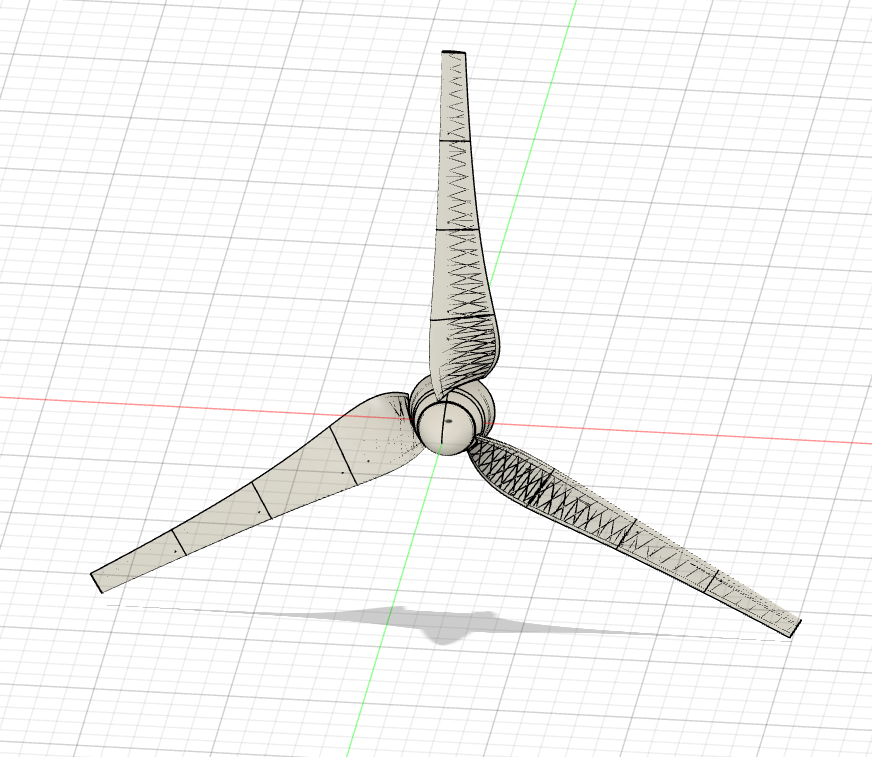
Also, there is an interactive preview of the model:
Printing
I split each blade into 4 roughly 190mm segments, so they fit on my Elegoo Saturn. I printed the blades on supports, though they have nice flat faces on the split planes. The reason I decided to not print them flat on the bed is to not form a suction cup and to allow the air from the to escape via the beam hole during the printing. If I printed them flat on the bed, the blades would collapse and form holes during printing. I also made sure that the infill does not form any closed cavities where the air and resin can get trapped.
Surprisingly, you can fit all three blades on a single build plate! With generous light-off time (the reason for this will be explained in an upcoming blog post) the print took about 12 hours to finish:

Priting the blades. All three blades fit on a single build plate!

Finished model

Finished model

Dry assembly

You can see the infill inside
First, I wanted to use Resione M68. It is a tough, quite flexible, and not fragile resin that is nicely snow-white. Recently I used it a lot and I like it. I even make the insert for my resin pouring spouts from it. However, on the first try I found out it has one property, that makes it not suitable for outdoor usage – it soaks moisture quite a lot. See the photo below. I made some experiments – read my findings of resins soaking water. Therefore, I decided to switch the resins and go with my favorite durable mixture – 80% Siraya Tech Fast and 20 % Siraya Tech Tenacious. This mixture is quite tough (though not as Resione M68, but it has a much harder surface and it is cheaper) and easy to print. The printed part of the blade weighs 158 g – therefore it is actually quite cheap to print the blades!
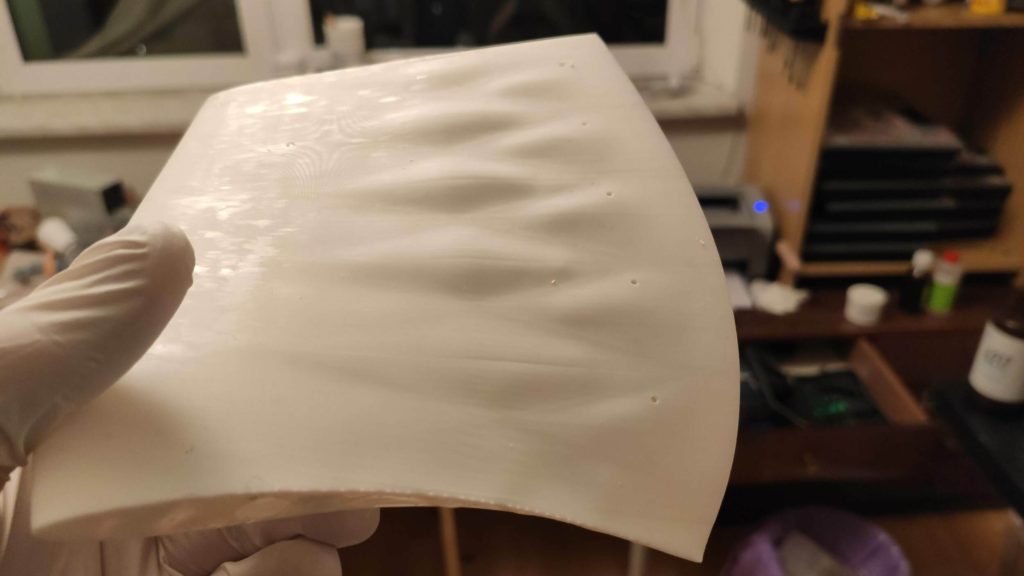
Resione M68 soaks water and wrinkles the surface

Resione M68 soaks water and wrinkles the surface
I also printed the turbine hub cover. It was a simple design. It is made out of two components that screw together so I can access the screws on the metal hub that hold blades. I used too lightweight supports, so the thread (M70) deformed slightly, but that is nothing that cannot be fixed with a file and a little handwork.


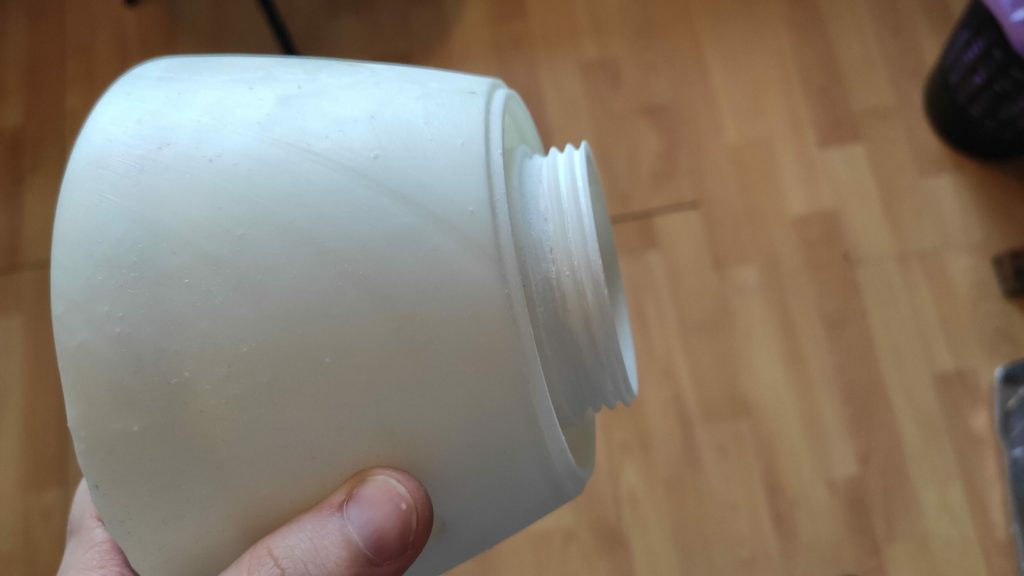

Printing the hub

Finished hub
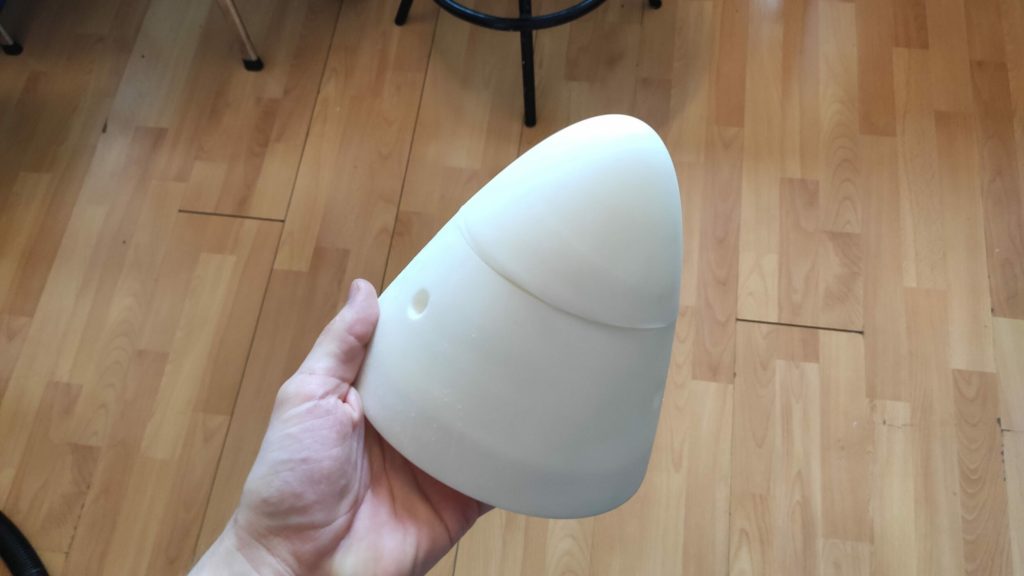
Finished hub

Finished hub

Finished hub

I used too light supports.
If you are wondering why the components have light and dark stripes on them: I like the snow-white color of M68. Therefore I experimented with mixing white pigment into my mixture. However, two things went bad: I mixed too little resin, therefore I had to mix a new batch during printing and I didn’t manage to get the tone right. And as I was mixing in rush, I didn’t mix the pigment properly, so there are some darker and lighter spots. It is just a cosmetic issue.
Assembly
Once printing is done, the tricky part comes – assembling the blade. The tricky part is gluing the individual pieces of the blade to the steel beam in a correct twist and placement.
I came up with the following process: I printed the followin aligment jigs:

Stop jig for the first piece
Stop jig for the first piece

Jigs for seeting the correct twist. They are put directly below the partition face between two pieces of the blade.
The allow me to put glue on all the pices, put them on the beams, assemble the beams with hub and them put the whole turbine on this jigs and put some weights on it. In this way, the blades will have a correct twist.
However, in order to make this procedure work, I need a flat surface to put it on. The alignment has be quite precise (otherwise the turbine looses efficiency). I used three old marble boards (they are out of old windowsill). I used spirit level to put them in plane like this:


Then it was just a matter of working quick – put glue on the spring steel beams, put the printed pieces on them and align them using the jigs:

Dry-assembly
Blade fits on the marble boards

Everything is glued and it just need to cure
The rest of the process is pretty standard and easy. I wet-sanded the blades and the hub to smooth out any small imprecistions, I used a putty for plastics to cover up small imperfections and then I spray painted the blades:

The finished blades with a putty before painting.
Finished turbine. Such a beaty, isn't it?
There were just two finishing touches to the blade. First, I drilled holes through the plastic pices and beams to put 2mm pin there to make sure the blades can’t fall of when the glue fails (e.g., due to weather conditions – extreme head). I modeled a massive pieces for the pins in the blade model. Second, I glued small winglets on the tips of the blades to make it less noisy.
Result
The finished turbine on the old body looks like this:


How does it perform in practice? Unfortunately, I don’t have a video of the new video on the pole (there was bad weather after installation). But once it was assembled I had to test it. Unfortunately, there was no wind on that day so I had to “walk the turbine” like a dog. It spins really nicely. It starts easily and it is really responsive to wind speed changes:
If you are interested in the turbine on the pole, I have a video of the previous version:
So now you might ask – how much electricity does the turbine produce? The answer is – currently none. There is no generator in the assembly. The turbine is just braked to prevent it from going into ridiculously high speeds. So all the energy goes to heat. Adding a proper and efficient generator to the turbine is actually quite challenging. Unfortunately, most of the DIY videos about wind turbines generating electricity are rubbish (I don’t want to be dishonest, but there is no proper engineering nor theory behind these videos). The authors usually just measure the voltage and they don’t care about current and power (so no information value on the actual power) or they connect 60 W light bulb that barely shines and they claim they “produce 60 W of power”. In fact, they probably produce less and with the size of the turbines they use, they should be able to get at least a couple of hundreds of watts. Also, none of the authors deals with the problem that the rotational speed of the turbine is linear to the speed of the wind, however, the power grows with the third power of wind speed. Therefore, to maintain a constant tip-to-speed ratio (and thus preserve optimal efficiency) you have to regulate the power you extract from the turbine. This is something I plan to do, but I haven’t actually managed to do so.
The second question you might ask “Why did you call it Aurae?”. Well, every project needs a decent name. Aura is the nymph of the breeze in Greek mythology. Why plural? It just sounds better.
What’s next?
This was my first attempt at printing the turbine. It worked quite well, but there is still room for improvement. In the next revision, I would like to focus on the infill of the blade. Recently, I stumbled upon Chaos (his Twitter and Youtube Channel) who prints aircraft on an SLA printer. He has some interesting findings, so be sure to check out his work. Based on his observations, I would like to improve the infill structure and consider making the last section of the blade self-supportive without a steel beam.
Another thing is that I will leave the current design outside for a few months to see how the resin copes with the weather conditions. I think it should do fine as it is painted.
Recent news: My open letter to the 3D-printing community
I love the 3D-printing community, but I think there is room for improvement. Let's get better in 2023! Read the full letter.
Support my work!
If you like my work (these blog posts, my software and CAD models) and you would like to see more posts on various topics coming, consider supporting me in various ways:
- You can become my sponsor on Github.
- If you prefer, you can also become my Patreon.
- You can buy me a coffee on Ko-fi,
- or you can buy something from my Tindie store (also see below),
- Or you can just share my work!
If you are interested in knowing what I am up to and recent sneak-peaks, consider following me on social media (Twitter, Instagram, Facebook).
My store offers
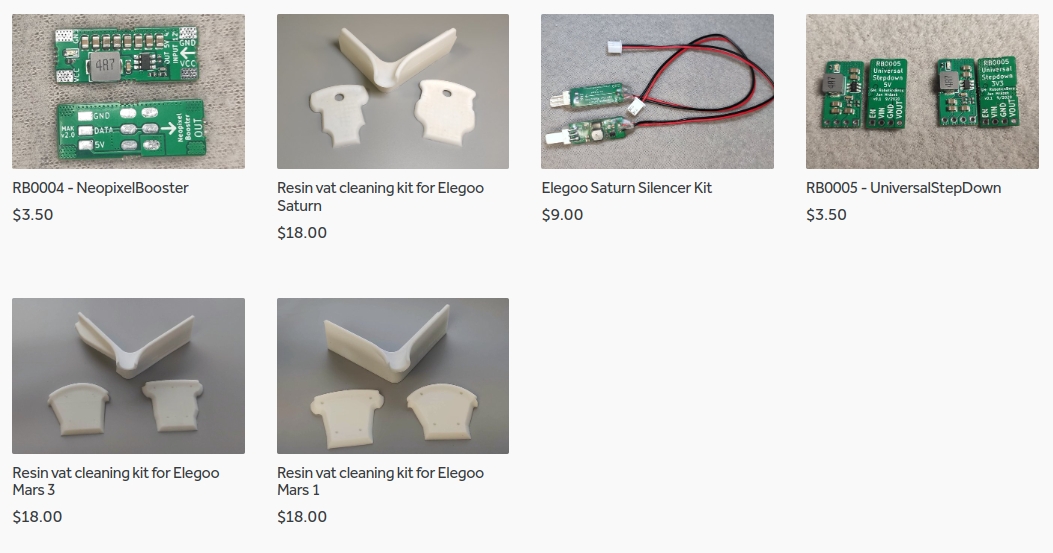
I launched new tank cleaning kits for Elegoo Saturn, Saturn S, Mars 1, and Mars 3. You can find them in my store.
Related Posts
- Multi-planar Slicing for 3D Printers – For Both FDM and Resin
- Open letter to the 3D printing community: Let’s be better in 2023! What should we do?
- Continuous Printing On LCD Resin Printer: No More Wasted Time On Peeling? Is it possible?
- About the Successful Quest For Perfect MSLA Printer UV Backlight
I think I would quite like to build one of these. It isn’t ready yet, because it needs the alternator and control electronics with some kind of speed sensing/braking mechanism. But it looks amazing.
My take would probably be to make a resin printed mold and use carbon fiber to increase stiffness and decrease mass. That is one option of the many to advance this design. I imagine if only printing one mold/plug a much larger single blade could be printed in one go on a Saturn/Mighty bed.
At the end of the day, coming up with a very highly efficient and well matched alternator/generator that allows starting at lower wind-speeds and can keep going when it’s just brief light gusts seems key. Integrating the electronics to manage the current draw also suggests putting an MPPT or charge controller on the hub itself might be a design choice, but I haven’tthought about it too deeply.
Major concerns about the structural integrity of RP components. Wouldn’t be surprised if this thing exploded while at speed. Need directional fibers for tensile strength. Blades are made of composites for this reason. Be careful. I have 2 turbines one of fiberglass, the other of carbon fiber. They endure mountain wind up to 120mph.
Thanks for the reply! This was considered during the design phase and validated by simulation. If the claimed resin properties by the manufacturer are true and the material properties do not change a lot during the time (e.g., by weather conditions) we should be safe. This whole build is an experiment to verify if such a manufacturing process for turbines is possible or not.
In case the blade fails, I will change my process to printing a really thin shell (serving as shape reference) and laminating it with epoxy and fiberglass.
Excellent planning, execution and reporting. A most inspiring read. My question is for the timid experimenter is it possible to scale the model down to use a generator the size of a Nema-17 stepper motor? ( can they be rewound?). Maybe now you have released your design someone else will pickup on the electronics? Best wishes and keep up the good work.
Instead of printing the blade you could print a mould and lay up fiberglass in it. Then any old type of printer could be used.
Joining the two halves could be a bit of a challenge though, unless you use the inflatable technique and press them together while wet, then inflate a bladder inside.
I’d be thinking of putting a motorcycle or moped alternator in the body.
Maybe some thin polyester (bed sheet) epoxied to the blades.
Fatigue is the enemy of wind turbine blades. More ductile materials have a better fatigue response and I wouldn’t say resin has good ductility. Either way, really cool project! I’d be curious to see a resin doped with tiny chopped carbon fiber powder or something along those lines.
Veľmi dobrý článok a veľmi dobrý výsledok. Som zvedavý ako dopadne elektrická časť s Vaším inžinierským prístupom. Nech sa Vám darí.
Hello, nice work. Speaking about generator I would go with car alternator. Tip speed ratio should be raised as high as possible (maybe up to 7 with three blades) in order to receive high RPM. Car alternator rotor should have permanent magnets installed or should be powered by Arduino (not generator’s own controller because at low RPM wind power is also low not like in car engine) or other types of microcontrollers. In order to get max power from wind I would measure wind speed with anemometer and, using microprocessor (by changing pulse with – PWM) supplied to rotor i.e. changing strength of rotor magnetic field, regulate the generator power. Maybe it is possible to put a chart RPM vs PWM to microcontroller. For RPM vs POWER chart I use http://windandwet.com/windturbine/power_calc/index.php webpage. By the way in the latter mentioned webpage you can find pipe blade design page also. Car alternator efficiency at low RPM is ~60%, but highest losses are because of “high” resistance of the wires and literally high current. Please see Ohms law P=I^2*R. Therefore if I would like to have 0,5 kW generator I would get car alternator of diesel engine. Such alternators are~1kW. For higher power I would get bus / truck alternators. So low power for powerful generator means higher efficiency. In order to transfer electricity to consumer I would rise voltage in order to decrease losses from wires + wire cross section of 230V and 12V for 1kW are different (P=I*U therfore if U is high then I gets low and power losses are lower by square – see first equation). I would use three phase transformer or buck / step-up converter to rise U – voltage and decrease I – current. The buck/step-up converter maybe has higher efficiency but the price also :). I wish you to have a interesting and creative experience during whole wind turbine construction 🙂
Dobrý den, bylo by možné stáhnout někde stl tohoto modelu?