If you follow my work, you know that I use my resin 3D printers a lot to produce soft silicone molds or pieces (original blog post and a follow-up). Resin printers can create precise and detailed patterns. You can quickly prototype, cast miniatures, dices, chocolate molds… There are plenty of uses for soft silicone molds. However, some silicones play well with resin-printed patterns, and some don’t. In this post, I will explain to you which silicones cause the trouble, why we care, and also, how to prevent the cure inhibition. The recipe I give you is surprisingly easy and doesn’t require any special equipment. It actually outperforms existing commercial solutions (e.g., Inhibit X) both in terms of price and performance.

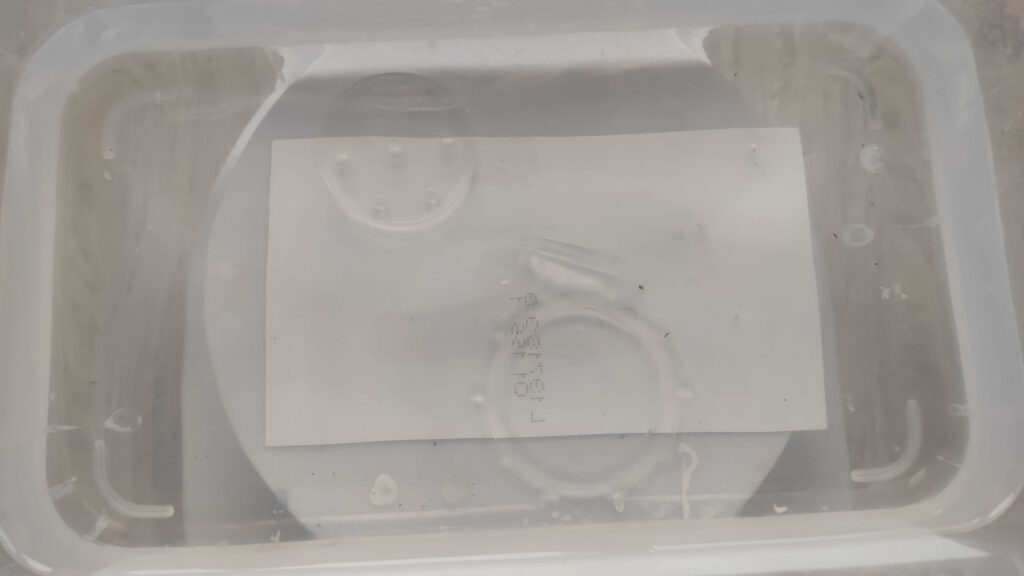
This is what happens if you cast platinum-cure silicone in resin-printed mold

This is what happens if you cast platinum-cure silicone in resin-printed mold

No cure inhibition after applying simple post-processing
Types of Silicone Rubber
When we talk about using silicone rubber for making a mold, there are two types: tin-cure and platinum-cure silicones.
The tin-cure silicones (often called condensation) are silicones that cure just fine in resin-printed molds. I’ve been using these silicones to manufacture my resin spouts and make all my molds. They cure by mixing in a small amount of curing agent (usually 2-3 % by weight). The curing agent contains salts of heavy metals that trigger the curing reaction. Once you mix it, it will happily cure. No matter if it is underwater, in a resin printer mold, if it is cold or hot. What matters is how much curing agent you add. If you add more, it cures faster, however, the resulting mechanical properties are worse (the rubber is more fragile and can be easily torn).
The second type is platinum-cure silicones. These silicones are often mixed in a 1:1 ratio of both compounds. Sometimes, they are mixed in a 10:1 ratio. This type of silicone is very sensitive to the curing environment. It doesn’t cure if it is in contact with: resin printed mold, tin-cure silicone, sulfur, latex, acetone, garlic, chlorine, duct tape, and more (see, e.g., this page for an extensive list). The inhibition, also often called “poisoning the silicone”, is permanent. The silicone will never cure in the presence of the substance. The near surrounding (from 0.1 mm to a couple of millimeters) of the poisonous instance just stays liquid and never cures. It doesn’t even turn into a gel.
You are probably wondering – why would anyone use platinum-cured silicones when they are so much trouble to work with? Their properties are far superior to tin-cure silicones. And if you use some kind of commercially made silicone equipment, it is probably platinum-cure silicone. To compare the properties, I will use Lukopren 5221 (tin-cure) and GMS A30 (platinum-cure).
First, they are much stronger (2 MPa vs 9 MPa), they are also much harder to tear, and often have a much longer elongation at break (150 % vs 500 %). When we talk about mold-making, platinum-cured silicones have often immeasurable shrinkage (though GMS A30 is an exception), tin-cured silicones usually shrink up to 2 % by volume. Platinum-cured silicones also do not degrade under UV light and also they don’t degrade with time. Since they are mixed in a 1:1 ratio, a static-mixing nozzle can be used to mix them on the fly. Platinum-cure silicones also often have much lower viscosity.
So there are a lot of reasons to use them, however, how to use them with resin-printed molds?
What Causes the Inhibition and How to Prevent It?
Let’s start with a disclaimer – I am no chemist and I understand it far, far worse than anything else. If I say something wrong or misleading here, please, let me know in the comments! I am happy to learn and fix the text accordingly.
When you google silicone cure-inhibition or poisoning, you find a lot of Reddit threads, YouTube videos, and texts that suggest the only solution – coat your printed model in some kind of varnish. And be sure it is not a varnish that also poisons silicone. This solution, is, however, unacceptable to me. I use my molds to make precise and detailed parts. Putting a varnish or paint is not only laborious, but it also changes the dimension significantly. It also gets stuck in low spots and removes details. There are users trying to find another recipe but without much luck.
When you try even harder or you have access to scientific journals, you can find several scientific papers about the topic. The most interesting one (and also the only one publically available) is PDMS Curing Inhibition on 3D-Printed Molds: Why? Also, How to Avoid It? This paper claims that the cause of the inhibition is the photoinitiator in the resin. Therefore, if you want to prevent the cure inhibition, you have to get rid of it (at least from the surface). Note that I have heard from multiple sources (including some manufacturers) that the source of the inhibition is not the photoinitiator but traces of sulfur in the resin that are left from the manufacturing process. I have no way of finding where is the truth.
Nevertheless, the paper above suggests two recipes: the first one is to cure for 4 hours and then keep the printed pieces heated to 60°C for 48 hours, or keep the printed piece at 120°C for 2-8 hours. This is rather extreme and has several downsides. The first method works only on half of the resins they tried (and also none of them is for LCD printers); the second method is unusable for large molds as 120°C if far beyond softening of most resins (most resins soften around 60°C). The authors don’t mind as they design molds for microfluidics, which are tiny and beefy. However, for large molds, we are out of luck (unless we use Siraya Tech Sculp or Sculp Ultra – but I haven’t tested if this method works due to its difficulty to execute).
There is also a chemistry blog that claims to solve the problem by long washing time. How long? They succeed after 48 hours of washing in a stirred bath of IPA or ethanol. And also they always use a virgin bath and change it 2 times during the procedure. This is not only expensive (we need a fresh bath every time), and time-consuming but also presents a problem with large molds as most resins soften when soaked in IPA for extensive periods of time.
Those were the DIY-feasible paths. There are also papers that suggest oxygen plasma treating, coating in metal using magnetron vapor spattering, and more. Unless you are Ben from Applied Science, this is not the way to go.
Therefore, I dig into a lot of experiments and tweaking. But I finally found a relatively simple and cheap recipe to post-process the molds in order to prevent the cure inhibition. If you want to learn more about this path, don’t leave after learning the recipe; there’s a section showing all approaches and dead ends I tried.
My Recipe Fore Platinum-cure Silicone Inhibition
The recipe I present I tested with most of the Siraya Tech Resins (Fast, Sculp, Tenacious, Blu, Fast + Tenacious Mixtures, Simple). I print the parts standardly and then:
- I wash them properly in two baths of IPA (just like I always do): first is a dirty bath to wash most of the resin, then a clean bath. I use Mercury X and each cycle is about 10 minutes.
- Then I do the third round of cleaning – this time in soap water. I rinse the prints properly. However, I had plenty of success without this step. It just ensures there are no uncured resin residua.
- Then there are two recipes:
- For any models (requires a coating solution):
- I cure the pieces for 30 minutes in Mercury X underwater. Without water, the process doesn’t work.
- I quickly dip dried and cured pieces into a 1% solution of polymethyl methacrylate (PMMA) in acetone. Once they dry, I repeat the dip. If you don’t know what PMMA is, then it is acrylic, often called plexiglass. If you have a complex model, I suggest even using a less concentrated solution with more dips so you prevent residue deposition on the surface where the acetone got stuck.
- For thick-walled models (requires no extra equipment):
- I cure the pieces for 30 minutes in Mercury X underwater.
- I let them sit for at least 6 hours in the water
- I change the water and cure them for another 30 minutes.
- No coating in PMMA is necessary.
- For any models (requires a coating solution):
That’s it. Now your printed parts are ready to be used for casting platinum-cured silicone!
Why this recipe? I noticed, that there has to be some interesting reaction (that I don’t fully understand) when curing underwater that prevents poisoning of the silicone. Air oxygen inhibits the curing reaction of the resin (which is hopefully a well-known fact). Originally, I thought that underwater curing is effective as it prevents oxygen from reaching the surface of the prints. Therefore, no oxygen can reach the surface and the curing reaction, that disarms the photoinitiator, happens also on the surface. However, I no longer think so. I tried using glycerol instead of water (which has the advantage that it is not soaked by resin). The prints were cured nicely (much better than on-air), but they still poisoned the silicone. Actually, after consultation with a few people, I think that the photoinitiator (or its residual products) actually dissolves in water when illuminated with UV, and thus, it is washed away. I suspect this is so also as the water after curing gets a weird rubbery and unpleasant smell.
Why are there two paths for thin and thick-walled models? It seems that completely washing the photoinitiator takes some time. However, resins soak water (see details) therefore, when you have a thin-walled model, it soaks the moisture quickly, softens, and gets deformed. Thick-walled models don’t lose structural integrity, therefore we can wash them properly. For thin-walled models, we try to eliminate as much of the photoinitiator as possible. For the rest, we try to seal it in a thin coating of PMMA that should prevent any photoinitiator from leaking to the surface. I had no success only with PMMA. My guess for that is as follows: The PMMA coating solution dissolves the photoinitiator on the surface and mixes with it. Therefore, if no elimination is performed, we get the photoinitiator (or its residua) all over the surface. However, if we first remove it from the surface, we can seal the surface. Without sealing, it seems that over time the photoinitiator (or its residua) leaks to the surface again. However, if we apply the long enough washing, this seems to be no longer the case. The PMMA creates an immeasurably thin coating and the printed pieces get a nice shiny surface.

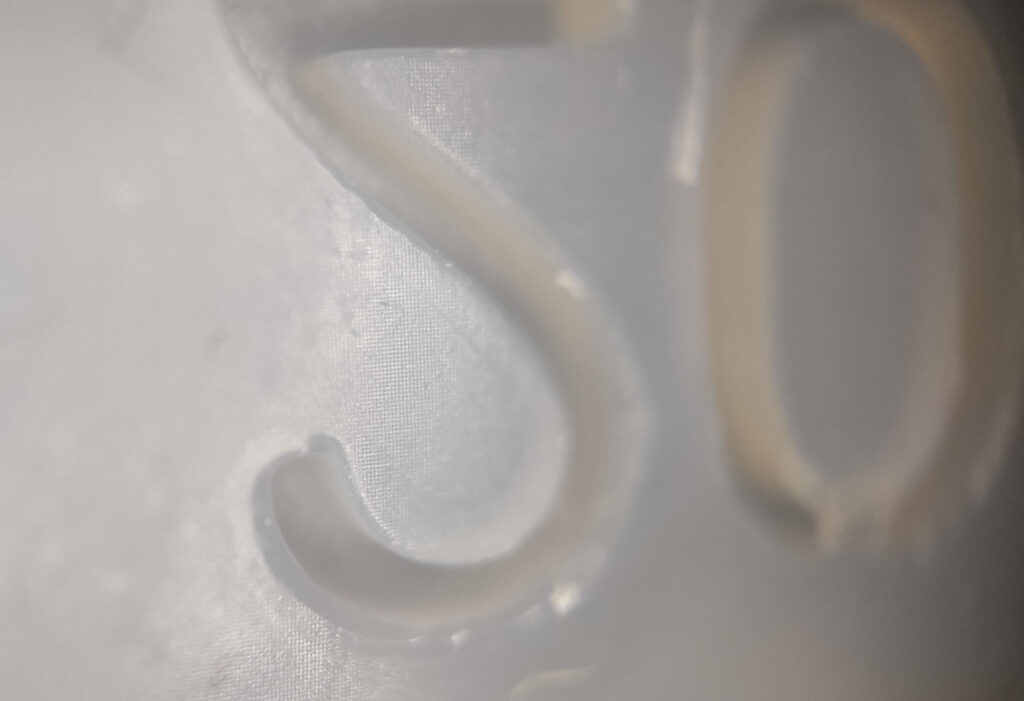
Test samples for coating. The "30" sample was coated with too concentrated solution of PPMA, whereas "40" sample was coated just right

Perfectly coated samples – you can hardly tell they were coated
To prepare the coating solution; you take a piece of (preferably clear) plexiglass and dissolve it in acetone. It takes about 1 hour to dissolve a piece. Note that there are better solvents for plexiglass (e.g, dichloromethane), but they are much harder to obtain.

Preparing the solution: Weighting acetone

Weighting PPMMA: I use old acrylic component prototypes
It takes several hours to fully dissolve.
Results
The results are more than satisfactory. I tested my recipe with the GMS A series of silicones and the SmoothOn Mold Star series. Post-processing adds about 45 minutes/5 hours (based on the path you choose) compared to traditional post-processing, which is bearable. In the coating paths, the patterns never go through any stress, therefore, they preserve dimensional stability. Some stress might be added in the slow path since the resin soaks some water. However, the coating is PMMA is easy to do and it does not disturb the surface in any way. You can actually see the individual voxels of the model imprinted in the silicone! This is a huge improvement over spray painting.


The process is, however, not 100% reliable. There are some free variables that I haven’t been able to identify and eliminate. Roughly in 1 out of 20 attempts, the silicone gets poisoned. If this happens, I rerun the process, and then I have so far succeeded. Therefore, there is some aspect of the process I do not have under control and I am not aware of its impact. Possibly ambient temperature? Humidity? I am not able to say at the moment. For this reason, I always try the silicone on a small part of the model whenever I have a new mold. Cleaning uncured silicone is really annoying.
The treatment also seems to be persistent. I have over 60 pulls from some of my molds without any need to repeat the process. Also, molds treated with PMMA do not need any mold release. The silicone does not stick to them.
The process doesn’t need any special equipment or hard-to-get or expensive chemicals.
One interesting finding is that PMMA seems to bond well to the surface and gives it a nice finish. It also seems to improve the nail-scratch resistance somewhat. Note that these are only my impressions during the experiments, I haven’t explored this aspect of the coating yet and I have no hard data on this.

Detail of the mold surface. See that it got shiny.

Detail of the mold surface. See that it got shiny.

Detail of the mold surface. See that it got shiny.
Hey, and What About InhibitX? Or Release Agents?
In one of my previous blog posts, I linked to Joshua’s blog post about preventing cure-inhibition. His solution was to use InhibitX. In the process of finding a working recipe, I also got a bottle of it. It is a pretty expensive substance (and also hard to get) – 300 ml costs about 70 €. You don’t use much of it, but still, pretty darn expensive (especially when you spill it).
InhibitX works, but it does not work on its own. Joshua heat treats the printed parts before soaking them in InhibitX. I also found that without heating them (though; I do not do it as aggressively as Joshua), InhibitX doesn’t work. However, InhibitX has one annoying issue. The silicone sticks really well to surfaces treated by it. Therefore, if you don’t apply a release agent, or don’t apply it properly, you can not only get a ruined casting but probably also a ruined mold. The silicone is really hard to get off. This is where the PMMA coating really shines – the silicone doesn’t bond.
This brings us to the usage of release agents. I have found that paraffine or vax-based release agents don’t prevent poisoning the silicone (e.g., Easy Release 200, Luporen separátor, and others). What somewhat works are PVA-based separators. However, they are really hard to apply correctly without leaving visible trace marks. PVA is also hard to apply on resin molds as it doesn’t soak the surface. What helps a little is to add a drop of soap to it. The PVA-based release agents also have a strong tendency to fill the low spots, and therefore lose details. I also stumbled upon problems with sharp edges – the separator did not stick there and the sharp edges caused inhibition. Lastly, you have to wash and reapply the coating before every use. Not worth the time and effort in my opinion.
PS: There are some people claiming that InhibitX is just naptha (according to the safety sheet). However, I don’t believe this is true. Naptha is only a solvent for the active ingredient, which is probably harmless, and therefore, is not listed on the safety sheet. I base my observation on the fact that the bottle says “shake well before use” (if it was only naptha, why mix it?) and the liquid also has some brown tint. Also, once it dries on a surface, it leaves brownish stains on the surface. I also did experiments with naptha and other solvents showing they do not prevent the inhibition.
The Path Towards the Recipe
The path toward finding the recipe was much longer than I anticipated. I had so many partial successes, that, however, have been shown to be dead ends. usually, the procedure worked for flat surfaces, but still, it caused inhibition in sharp inner corners.
I used a triangular staircase model for my test (see photos below). This model is small enough to not waste too much material and it also contains details and inner corners. The internal corners showed to be crucial for the experiments as they cause most of the troubles. Some methods worked well on external surfaces, however, the internal corners suffered.
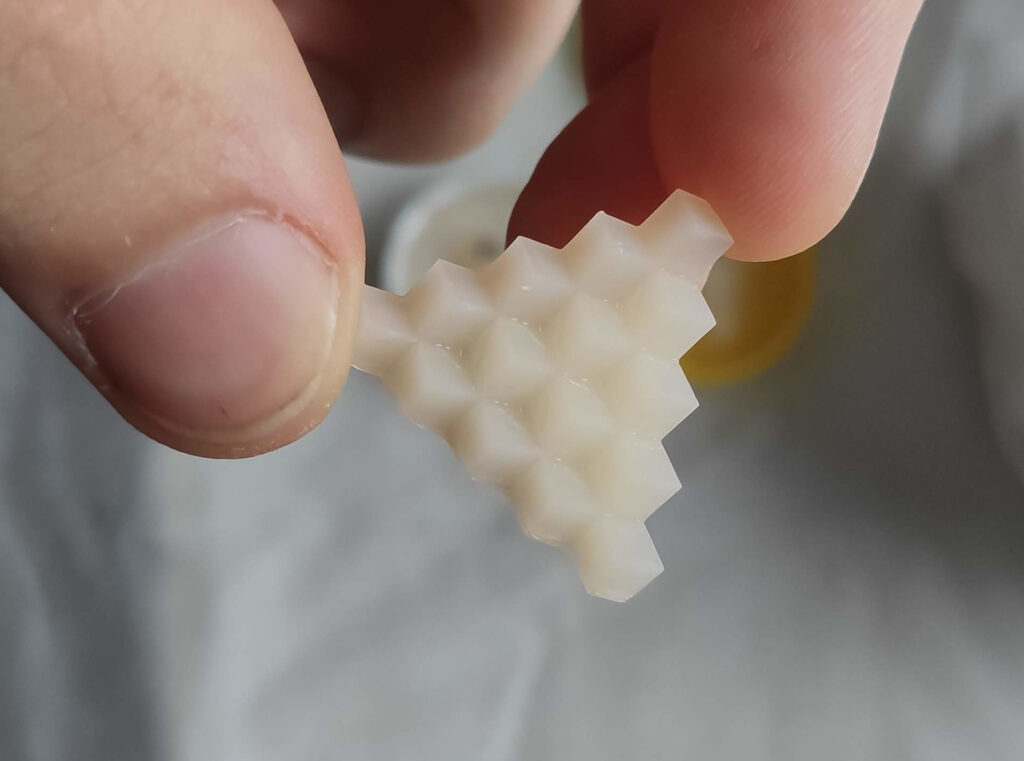
The test piece
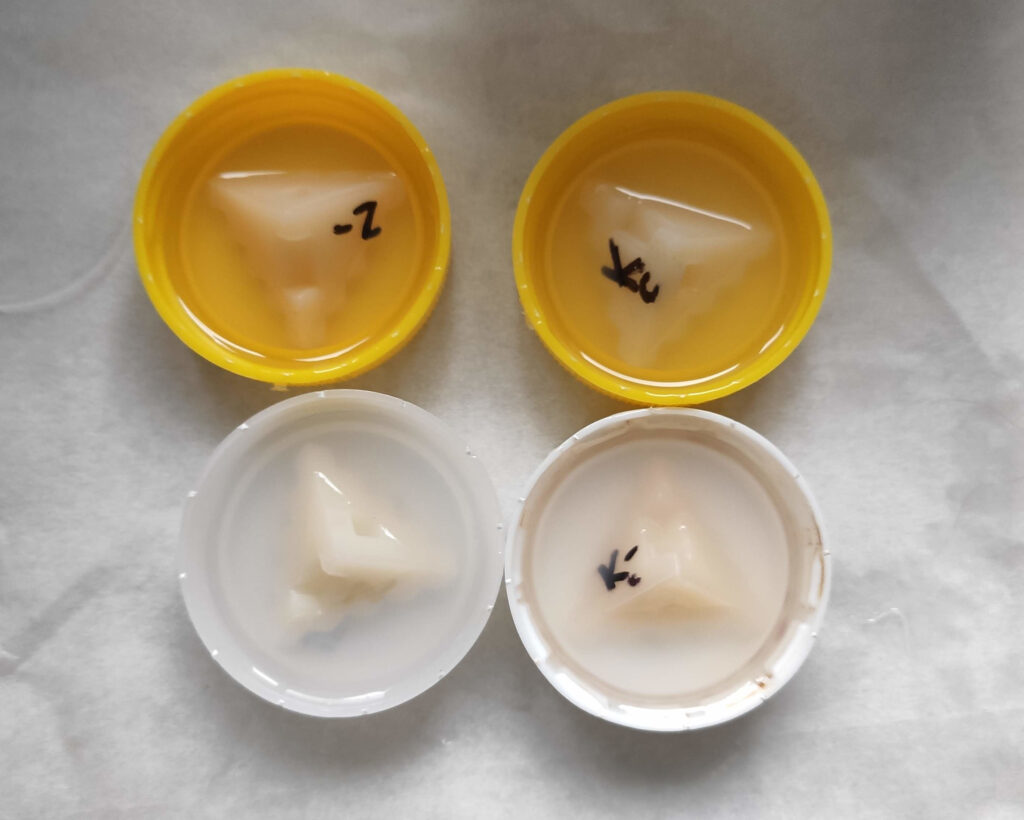
I used small cups to hold the silicone

Test piece that caused partial poisoning

Poisoning of the silicone

Poisoning of the silicone

The test piece with a poisoned silicone

About 1/8 of all my test samples

Detail of the test samples
In some cases, the air bubles caused the posioning

Posioned piece

Perfect sample - no poisoning occured
First, I experimented with curing the models. I tried curing them for a long period of time, using summer sunlight, curing them warm, and cold. I even cured them locally with a high-power LED. I also tried various wavelengths from 460-304 nm. None of it gave promising results.
I tried various cleaning methods. From soap, ultrasonic cleaner, and various solvents (ethanol, acetone, xylene, naptha, …). Also, none of them seem to be 100% working.
Washing the prints in sodium hydroxide gave interesting results. Based on the length of washing, the cure inhibition was either more-less prevented or started again. It seems like in short washing cycles (10 % solution for 10-15 minutes) it gets rid of the photoinitiator. However, washing it longer again starts poisoning the reaction again. This might be due to the fact that NaOH damages the resin (as confirmed by the guys from Siraya Tech) and therefore, more poisonous compounds are brought to the surface. Interestingly enough, washing in a 20 % solution of citric acid has a similar effect.
Conclusion
Although I showed you the relatively simple procedure for preventing the cure inhibition, it is still some extra work and it is up to you to judge if it is worth it. If you make a mold for a single or only a few pulls, it might be worth it to just use tin-cure silicone. They don’t require any post-processing (they even cure in just cleaned and cured mold) and work just fine – after all, I used them for the last two years for all the mold making.
However, if you require a long-lasting or extremely strong mold, the process is definitely worth it. The search for the recipe was after all started after I released my resin tank cleaning kits. If you don’t know them, check the video below:
So far, I made them from tin-cured silicones. However, starting January 2022, all my spouts are made using high-quality platinum-cured silicone. Therefore, the spouts and spatulas should last indefinitely. This is also why the kits were unavailable for a few weeks – I was switching the process. Also note that I extended those kits for new printers: Mars 1 and Mars 3. You can check them out in my store.
Recent news: My open letter to the 3D-printing community
I love the 3D-printing community, but I think there is room for improvement. Let's get better in 2023! Read the full letter.
Support my work!
If you like my work (these blog posts, my software and CAD models) and you would like to see more posts on various topics coming, consider supporting me in various ways:
- You can become my sponsor on Github.
- If you prefer, you can also become my Patreon.
- You can buy me a coffee on Ko-fi,
- or you can buy something from my Tindie store (also see below),
- Or you can just share my work!
If you are interested in knowing what I am up to and recent sneak-peaks, consider following me on social media (Twitter, Instagram, Facebook).
My store offers
I launched new tank cleaning kits for Elegoo Saturn, Saturn S, Mars 1, and Mars 3. You can find them in my store.
Related Posts
- Multi-planar Slicing for 3D Printers – For Both FDM and Resin
- Open letter to the 3D printing community: Let’s be better in 2023! What should we do?
- Continuous Printing On LCD Resin Printer: No More Wasted Time On Peeling? Is it possible?
- About the Successful Quest For Perfect MSLA Printer UV Backlight
it’s cool post i have ever seen about 3dprinted silicone mold!
Your using inhibit-x wrong. You can’t soak your molds in it it has to be brushed dipped or sprayed. The solvent in it needs to evaporate off leaving the curing agent behind.
What’s the difference between brushing and letting the model dry and soaking/dipping it in a bath of Inhibit X, shaking the excess off and drying it? I use the dipping/soaking methods as I have complex molds that are really hard to brush properly and evenly.
Really There’s no difference performance wise between dipping and brushing. Soaking doesn’t make any difference you’ll still have to let the solvent flash off leaving the curing age behind 3 or 4 times.
I had been using 12min cure in water for my dice, proceeded with lye solution soak. 24/25 success so far
Interesting read, thanks!
Recently read a FAQ article by Smooth-On (link below) which claims that it would be sufficient to fully cure models when using their (platinum) silicones., but that sounds a bit to optimistic after seeing your tests.
https://www.smooth-on.com/support/faq/210/
I’ve tried curing for several hours. Tried leaving them in the sun for days. Tried the spray paint. No luck. I have noticed if I spray the molds with Matte or glossy clear The inhibit x works with less coats. Maybe sealing the surface help the Inhibit x. If the inhibit x gets contaminated with water or IPA, you’ll still get cure. Inhibition.
The plexiglass your dissolving in acetone is it polycarbonate or acrylic? I’m willing to give your process a try. It would definitely save me money, especially on the mold release.
It’s acrylic (PMMA – Poly(methyl methacrylate) – https://en.wikipedia.org/wiki/Poly(methyl_methacrylate) )
Have you done any more testing about this:
“One interesting finding is that PMMA seems to bond well to the surface and gives it a nice finish. It also seems to improve the nail-scratch resistance somewhat. Note that these are only my impressions during the experiments, I haven’t explored this aspect of the coating yet and I have no hard data on this.”
I was wondering if it might help/solve the mechanical wear that most resins have, maybe compare it to the ST Fast Mecha resin?
Great article as always, I’ll have to try this myself soon.
What exact resin did you use with this method? I haven’t been able to replicate it with Anycubic Basic Black, even with longer curing/soaking times. Going to test it with Siraya ABS-like Fast Grey tomorrow.
NVM, missed the mention of Siraya in your post. Anyway, I’m using your recipe (the one without PMMA) and Siraya ABS-like Fast Grey still inhibits my silicone; however I use a makeshift UV box with four 405nm UV lamps instead of Mercury X. So maaaaaybe the intensity of UV is not enough (even though it cures the liquid resin so the wavelength is 100% ok). I had a limited success when heating my models at 60-70C for prolonged periods of time (7-12 hours) after using your method (heating alone OR soaking alone does nothing). Small and thin-walled (1 mm) models had no inhibition, but larger and thicker ones (2.5 mm) only had their inhibition reduced.
To any fellow silicone makers stumbling upon this comment: I’ve done multiple tests on Siraya ABS-like Fast Grey models (hollow, 2/5 mm thick, height ranging from 6 to 18 cm) and the only thing that helps in my case is a long-term heating. 36 hours at 65-70C or 24 hours at 90 C. (For smaller models, thin-walled and not exceeding a centimeter or two, 7-9 hours at 65-70C should be enough). I’m using a makeshift heater made from old kitchen cabinet, insulation and a few 95W incandescent lamps (four can provide up to 90C and six can even do 120C). You can ramp up temperature even higher for faster heat curing; I had dice-sized models fully cure after 2 hours at 120-150C. The catch is: larger models will almost certainly crack at this temperature (danger zone for black ones is as low as 75C).
The protocol is likely the same for Anycubic Basic Black; I haven’t counted hours in that case but prolonged heating cured my models made from it as well.
Hi, I have tried platinum silicone straight into JLCPCB white resin moulds with no protection and it has cured well. I wonder if their post processing/cleaning has enabled this?
Silicone cure inhibition seems to vary quite a bit depending on what resin your start with. I have a friend who makes designer toys, cast from molds of her 3D prints, and she swears by EPAX Hard Grey resin. She prints the masters in EPAX Hard Grey, and takes no particular extra steps to prevent mold inhibition; just washing in IPA and post curing in a UV chamber (not water curing), fairly standard for any resin print. Then she can go straight to molding the parts in platinum-cure silicone. Not sure how the chemistry in EPAX Hard might be different, but for whatever reason it just doesn’t seem to cause any cure-inhibition.
Same with Siraya ABS-Like Fast Navy Grey (specifically this color, it differs in composition from others and there are even specific exposure settings for it). It needs to “rest” for a few days after printing though, but no extra processing is required. Other resins keep inhibiting silicone even if they were printed weeks ago.
Dear Sir:
Good day .
This is John from shenzhen DC Silicone which is a leading manufacturer of silicone rubber for 12 years.
If you can get:
1. Quality silicone perform comparable to Dow Corning, Smooth-on at a competitive price(5USD/KG~10USD/KG).
2. Free Sample for testing if you doubt about the quality.
3. Free technical support with professional R&D department in the silicone business for 12years.
would you like to have a try?
Kind regards
John
Hi, John –
I’d love to give your product a try. Do you have a link to a store I could buy it from?
Would this solution be able to be sprayed rather than dipped/dunked? Can the solution be used on bigger walled props? I’m trying to make a big cosplay prop that’s like 5 feet long, so if I were to dunk it that’s be a loooot of acetone I’d need aha… So I was wondering if it’s possible to spray the mixture and have a similar result.
I also wonder if it’s ok to use the mixture if the prop is thick walled
This was mind-blowingly good. You can’t even comprehend how much I needed this trick. I was struggling for months with facial prosthetics that were never quite set in the printed resin moulds. I have tried this method (the first without the acetone) and it friggin worked!!!!! Jesus Christ this is what finally broke the deadlock.
I washing the resin part in solution of 5g NaOH in 100ml water , 24H , and washing with liquid detergent , is the best solution for make silicone platinum cure silicone .
This was a really good article! I use SmoothOn Platinum cure putty with FDM printed PLA molds and it works really well. I’m using them for custom gaskets. With 0.12mm layer height and ironing on all top surfaces, I can achieve molded features of >=1mm.
Thank you for all your work investigating this. I have a question – is there a reason the thin walled method needs to be PMMA specifically?
I ask because am having trouble sourcing pieces of plexiglass/acrylic/PMMA in my country without buying metre long slabs. My first thought of a smaller substitute was those very thin, clear acrylic fake nails which wikipedia says are made of PMMA. But they’re very thin and bendable, which makes me wonder if they might just be ABS that has been falsely mislabelled or something like that. What would happen if you applied a coat of ABS/acetone instead?
The only reason I chose PMMA is that it dissolves in acetone nicely without damaging the PMMA. Once acetone dries out, it should be pretty much unchanged (this is how some PMMA glues work). Give it a try with ABS – I don’t have any experience.
Thanks for the extensive writeup. I tested the 30 min water cure, 6 hour wait and another 30 min water cure with fresh water on the Heygears PAP10 resin and that does not work. The silicone is still inhibited.
I am testing further resins to see if I can find one where it works.
Elegoo water washable grey 2.0 doesn’t work with the water cure routine either.
PAH10 from Heygears also doesn’t work with the water bath method, nor with the PMMA(1%) solution – dipped twice, drying completely after first dip. I also tried flame annealing with a propane torch, also didn’t work.
PAWR10 from Heygears also doesn’t work with this method, even though this guy: https://www.youtube.com/watch?v=AMIVOI20l74 uses it and just uses a release agent, of which I have bought the exact same. Even got the same silicone as him. Full cure inhibition on all pieces, whether dipped in PMMA, water cured, normal cured, release agent…. I am cursed
Recently, I had success with Prusa resins. They didn’t require any special post-processing.
Thanks for the follow up. I have bought resins from siraya, elegoo, anycubic, jamg he, but no prusa. Any specific one, because they literally have about 100 to chose from.
Thanks so much for this post. Here you are years later helping people out still. I have always used acrylic primer on parts printed with Formlabs Tough 2000, Clear and Tough 1500 resins to prevent cure inhibition with Smooth-On and Silicones Inc. silicones. I feel like its been fairly reliable, but the geometry is always changed just a bit by the layers of paint. I’ll get back to you as soon as I am able to test with the AA bath. Thanks!